How Often to Season Cast Iron Without Costly Mistakes
Mastering cast iron means understanding its unique seasoning. This guide demystifies how often to season cast iron, explaining when and why to apply new layers of polymerized oil. You’ll learn the tell-tale signs your pan needs attention, the factors that influence seasoning frequency, and practical steps for both deep seasoning and everyday maintenance. Achieving a naturally non-stick, rust-resistant surface is simpler than you think with consistent care.
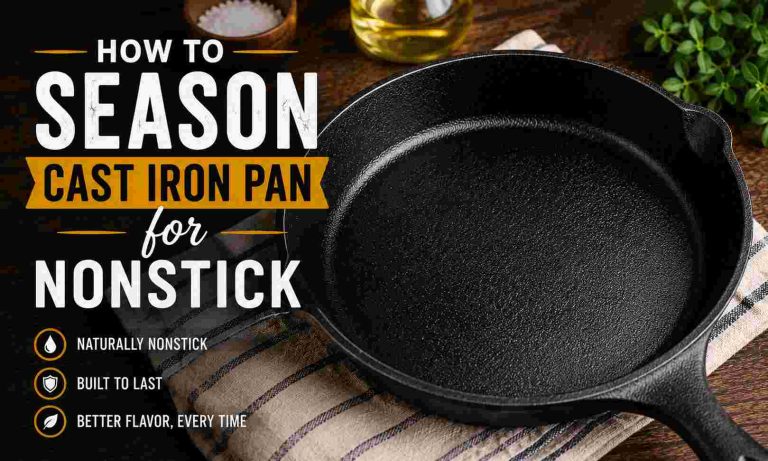
Mastering Cast Iron: How Often to Season for Perfection
Welcome, fellow cast iron enthusiast! You’ve likely heard the whispers, the legends, the sometimes-conflicting advice about cast iron care. At the heart of it all lies one magical word: “seasoning.” It’s what makes your pan non-stick, protects it from rust, and gives it that beautiful, dark sheen. But perhaps the most common question—and the one that causes the most confusion—is: “How often do I actually need to season cast iron?”
Fear not! This comprehensive guide is here to clear up the mystery. We’re going to dive deep into the world of cast iron seasoning, teaching you not just how to do it, but crucially, when and why. By the end, you’ll feel confident in assessing your pan’s needs and keeping it in top-notch condition for generations of delicious meals. Let’s get started!
What Exactly is Cast Iron Seasoning?
Before we talk about frequency, let’s quickly clarify what seasoning is. It’s not just a layer of oil. When you heat oil on cast iron, it goes through a process called polymerization. The oil breaks down, bonds with the metal, and forms a hard, slick, plastic-like layer. This layer is what gives cast iron its desirable non-stick properties and acts as a barrier against rust. Over time, with consistent use and care, these layers build up, creating an incredibly durable and effective surface.
Understanding Your Cast Iron’s Current State
The first step to knowing how often to season cast iron is learning to read your pan. Its appearance and performance will tell you everything you need to know.
Visual Cues of Good Seasoning
- Dark, Even Color: A well-seasoned pan typically has a deep, uniform black or very dark brown color. It should look like polished slate.
- Smooth, Almost Glassy Surface: While not perfectly smooth like non-stick, good seasoning fills in the microscopic pores of the iron, creating a relatively slick surface.
- Slight Sheen: It should have a subtle, healthy glow, not a dull or dry appearance.
- Non-Sticky: This is the ultimate test! Food releases easily without excessive sticking. Eggs should slide around with minimal effort.
Signs Your Cast Iron Needs Seasoning
- Food Sticking Consistently: This is the most obvious sign. If your food is frequently gluing itself to the pan, the seasoning might be thinning or damaged.
- Dull, Grey Patches: If your pan starts to look dull, dry, or has lighter grey patches, especially after cooking acidic foods or rigorous cleaning, it’s time to re-season.
- Rust Spots: Any sign of reddish-brown rust is a clear indicator that the protective seasoning layer has been compromised and needs immediate attention. If you encounter rust, learning how to clean a rusty cast iron skillet is your first step before re-seasoning.
- Rough or Gummy Texture: If your pan feels sticky or gummy, it’s usually a sign of too much oil applied during seasoning or not heating it enough. While not a need for *more* seasoning, it indicates the existing seasoning needs fixing.
- Flaking Seasoning: If pieces of the seasoning are flaking off, it means the layers aren’t properly bonded. You might need to strip and fully re-season these areas.
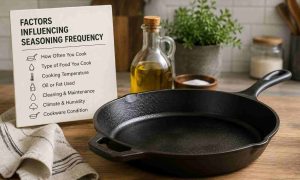
Factors Influencing Seasoning Frequency
There’s no single, universal answer to “how often to season cast iron” because several factors play a role.
How Often You Cook
The more you cook with your cast iron, especially with fats and oils, the more you’re naturally contributing to its seasoning. Frequent use with beneficial foods (like bacon, fried chicken, or anything cooked with a decent amount of oil) can actually build seasoning. If you cook daily, you might need deep re-seasoning less often.
Visual guide about Mastering Cast Iron How Often to Season for Perfection
What You Cook
Acidic foods like tomatoes, citrus, wine, or vinegar can strip away seasoning layers. If you frequently simmer tomato sauce in your cast iron, you’ll likely need to re-season more often than someone who primarily fries eggs and sear steaks.
How You Clean It
Aggressive scrubbing with abrasive pads or harsh detergents can wear down seasoning. While a little soap is generally fine on well-seasoned cast iron, excessive scrubbing or using a dishwasher (a definite no-no!) will quickly undo your hard work. Understanding how to clean cast iron without removing seasoning is crucial for maintaining its integrity.
Storage Conditions
High humidity is the enemy of cast iron. If your pan is stored in a damp environment, it’s more prone to rust, even if it’s well-seasoned. Proper storage (dry, uncovered) reduces the need for frequent re-seasoning due to rust. Always ensure it’s bone-dry after cleaning.
Type of Oil Used
Different oils have different smoke points and polymerization properties. Some oils create more durable seasoning layers than others. For seasoning, look for oils with a high smoke point and good polymerization qualities, like grapeseed, flaxseed, canola, or vegetable oil. You might be surprised to learn that not all oils are created equal for this purpose; for more detail, check out what oil to use on cast iron after cleaning.
General Guidelines for Seasoning Frequency
Now for the actionable advice! Here’s a breakdown of “how often to season cast iron” under different circumstances.
Initial Seasoning (New or Stripped Pan)
If your cast iron is brand new (and not pre-seasoned), or if you’ve completely stripped an old pan down to bare metal to remove rust or old, flaky seasoning, you’ll need to build a strong base.
Frequency: At least 3-5 coats initially, sometimes more.
Method: This requires a full, deep seasoning process, typically in an oven or on a stovetop. You can learn how to season cast iron with an oven for the most common and effective method, or explore how to season cast iron without an oven if that’s not an option.
After Every Use (Light Maintenance Oiling)
This is your most important daily habit for maintaining excellent seasoning. It’s not a full “seasoning” in the traditional sense, but a crucial protective step.
Frequency: After every time you wash and dry your pan.
Method: After cleaning and thoroughly drying your pan (ideally over low heat on the stovetop), apply a *very thin* layer of high smoke point oil (like vegetable or canola oil) to the entire cooking surface. Wipe off any excess until it looks like there’s almost no oil left. Then, heat the pan on low-medium heat for a few minutes until it just starts to smoke, then turn off the heat and let it cool. This seals in the moisture and keeps your existing seasoning healthy.
Regular Deep Seasoning (As Needed)
This is where you re-apply multiple layers of polymerized oil, similar to the initial seasoning, but usually just 1-2 coats.
Frequency: Every few months for regularly used pans, or when you notice signs of degradation (dullness, minor sticking, light grey patches).
Method: Follow the steps for a full seasoning (cleaning, oiling, heating) but you might only need one or two cycles. The key is to address issues before they become major problems like rust. If you cook often, your daily maintenance might mean you rarely need this deep re-seasoning.
After Cooking Acidic Foods or Heavy Cleaning
Acidic foods and aggressive cleaning (even with just hot water and a stiff brush) can strip some seasoning.
Frequency: Immediately after these instances.
Method: After cleaning, perform a light maintenance oiling as described above. If the pan looks particularly dull or food started sticking more, consider one extra round of heating the oiled pan on the stovetop until lightly smoking, then letting it cool.
When Rust Appears
Rust is a critical warning sign that your seasoning has failed.
Frequency: Immediately upon seeing any rust.
Method: You *must* remove the rust first. Use methods like scrubbing with steel wool, salt, or vinegar. Once the rust is completely gone, thoroughly clean, dry, and then perform a full, multi-coat re-seasoning process to protect the exposed metal. Ignoring rust will only make it worse.
Step-by-Step: How to Season Your Cast Iron (When It Needs a Full Re-Season)
This process is for when your pan is stripped, rusty, or its seasoning is significantly degraded.
Step 1: Clean Your Pan Thoroughly
If your pan is rusty or has significant old, flaky seasoning, you need to strip it down. This might involve steel wool, a chainmail scrubber, salt, or even a vinegar bath for rust. The goal is to get a clean, bare metal surface or at least a uniformly smooth, non-flaking surface. Wash with hot water and a little dish soap if necessary—don’t worry, the seasoning isn’t there yet to protect!
Step 2: Dry Completely
This is crucial. Moisture is the enemy of cast iron. Place the clean pan on your stovetop over low heat for 5-10 minutes. It should be bone dry, with no visible moisture, before moving to the next step. You can even see a slight greyish change in color when it’s totally dry.
Step 3: Apply a Thin Layer of Oil
Using a paper towel, apply a *very thin* layer of a high smoke point oil (like grapeseed, flaxseed, canola, or vegetable oil) to the entire surface of the pan—inside, outside, handle, and bottom. Then, with a clean paper towel, wipe off as much oil as you can. It should look like there’s no oil left, just a slight sheen. Any excess oil will lead to a sticky, gummy finish.
Step 4: Heat the Pan
There are two main ways to heat:
- Oven Method: Preheat your oven to 450-500°F (230-260°C). Place the oiled pan upside down on the middle rack (place aluminum foil or a baking sheet on the rack below to catch any drips). Bake for one hour. Turn off the oven and let the pan cool completely inside the oven. This helps the seasoning bond properly.
- Stovetop Method: Place the oiled pan on your stovetop over medium-high heat. Heat until it starts to smoke slightly (this is the oil polymerizing). Use tongs and a paper towel to carefully wipe the surface again as it heats, removing any pooling oil. Continue heating for 10-15 minutes, ensuring good ventilation. Let it cool completely.
Step 5: Cool and Repeat
Once the pan has cooled down and is safe to handle, inspect it. For new or stripped pans, you’ll want to repeat Steps 3 and 4 at least 3-5 times to build a robust initial layer of seasoning. For maintenance, one or two cycles might suffice.
Step-by-Step: Everyday Maintenance Seasoning (After Each Use)
This is your ongoing routine to keep that seasoning strong and beautiful.
Step 1: Clean Gently
After cooking, scrape out any food residue with a spatula. Wash the pan with hot water and a stiff brush or a chainmail scrubber. A tiny amount of dish soap is fine for well-seasoned pans, but avoid abrasive pads or excessive scrubbing. Focus on removing food, not scrubbing off the seasoning.
Step 2: Dry Thoroughly
Immediately after washing, dry the pan completely with a towel. Then, place it on your stovetop over low-medium heat for 2-3 minutes to ensure all moisture evaporates. You want it bone-dry.
Step 3: Apply a Very Thin Layer of Oil
Once dry and slightly warm, apply just a few drops of a high smoke point oil (like vegetable, canola, or grapeseed) to the cooking surface. Use a paper towel to rub it into the entire interior surface, wiping off *all* visible excess. It should look dry, not oily.
Step 4: Heat Briefly
Continue heating the pan on low heat for another 2-3 minutes until you see a wisp of smoke or it just begins to feel tacky. Turn off the heat and let it cool down on its own. This brief heating helps the oil polymerize and reinforces the seasoning.
Choosing the Right Oil for Seasoning
The best oils for seasoning cast iron have a high smoke point and good polymerization properties.
- Grapeseed Oil: High smoke point, neutral flavor, and great for seasoning.
- Flaxseed Oil: Can create a very hard, durable seasoning but can sometimes flake if not applied *extremely* thin. Often recommended for initial seasoning.
- Vegetable/Canola Oil: Readily available, affordable, and effective for both cooking and seasoning.
- Avocado Oil: Very high smoke point, great for cooking and light seasoning maintenance.
Avoid olive oil for seasoning, as its lower smoke point makes it prone to becoming sticky. Also, while animal fats like bacon grease can contribute to seasoning, they can also go rancid if stored on the pan for long periods without proper polymerization.
More read: 10 Best Cast Iron Seasoning Oils
Tips for Maintaining Your Cast Iron’s Seasoning
Prevention is key to reducing how often you need to season cast iron.
- Avoid Harsh Soaps (Mostly): Modern dish soaps are milder than old lye-based soaps and generally safe for well-seasoned cast iron. However, strong scrubbing or prolonged soaking with soap can strip seasoning. Stick to hot water and a stiff brush for most cleaning.
- Scrape, Don’t Scrub Aggressively: Use a flat-edged wooden or metal spatula to scrape food residue while cooking. For stubborn bits, hot water and a chainmail scrubber are excellent. Avoid steel wool or harsh abrasive pads unless you’re intentionally stripping the pan.
- Cook with Oil: Every time you cook with a bit of oil or fat, you’re contributing to your seasoning. Pan-frying, searing, and shallow-frying are particularly beneficial.
- Store Properly: Always store your cast iron in a dry place. If stacking, place a paper towel or cloth between pans to prevent scratching and absorb any residual moisture.
- Don’t Air Dry: Never let your cast iron air dry. Always towel dry immediately and then heat on the stovetop for a few minutes to evaporate any remaining moisture.
- Use It Often: The more you use your cast iron, the better its seasoning will become. It’s a tool meant for regular use!
Troubleshooting Common Seasoning Issues
Don’t worry, many seasoning problems are fixable!
Sticky or Gummy Surface
This happens when too much oil was applied during seasoning, or the pan wasn’t heated long enough at a high enough temperature for the oil to fully polymerize.
Fix: Scrub the sticky spots with hot water, a stiff brush, and maybe a little dish soap or even some coarse salt. If it’s very sticky, a chainmail scrubber can help. Then, dry completely and apply a *much thinner* layer of oil, ensuring you heat it longer until it smokes. Repeat if necessary.
Flaking Seasoning
Flaking usually means the seasoning layers didn’t bond properly to the metal, or previous layers were too thick.
Fix: You’ll need to remove the flaky areas. Scrape them off with a metal spatula or chainmail scrubber. You might need to gently sand with fine-grit sandpaper for stubborn flakes. Clean the area thoroughly, dry, and then apply several thin layers of new seasoning. For severe flaking, you might need to strip the pan entirely and start fresh.
Rust Spots
Rust indicates moisture exposure on bare iron.
Fix: Act immediately. Scrub the rust off with steel wool, coarse salt and oil, or a vinegar solution. Ensure all rust is removed. Clean the pan thoroughly, dry it completely, and then perform at least 2-3 cycles of full re-seasoning to protect the exposed metal.
Food Sticking
This is the classic sign that your seasoning is weakening.
Fix: After cleaning your pan, perform one or two cycles of stovetop seasoning (apply thin oil, heat until smoking, cool). Also, ensure you’re cooking with enough fat and preheating your pan properly before adding food. Over time, regular use with maintenance oiling will improve stick resistance.
Conclusion
Mastering cast iron care, particularly understanding how often to season cast iron, isn’t about rigid schedules but about attentiveness. Listen to your pan. Look at it, feel it, and pay attention to how your food cooks. A little love and regular, gentle maintenance will keep your cast iron skillet performing beautifully for decades, becoming an heirloom piece that gets better with every meal.
Remember: initial seasoning lays the foundation, daily maintenance builds on it, and occasional deep re-seasoning remedies any wear and tear. With these simple practices, you’ll ensure your cast iron remains a joy to cook with, delivering that unmatched flavor and performance we all cherish. Happy cooking!