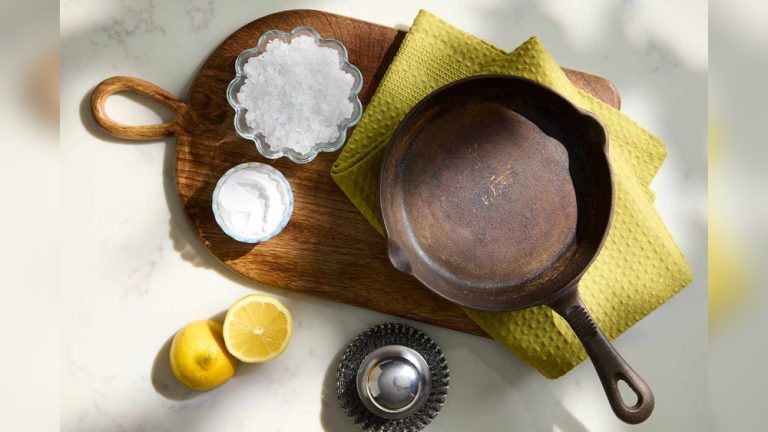
How to Clean Cast Iron Without Removing Seasoning: Expert Tips 2026

Cleaning cast iron cookware can feel confusing. I used to worry I would ruin the seasoning. Many home cooks love cast iron because it lasts for generations and adds a depth of flavor. The real secret is the seasoning—a baked-on oil layer that gives cast iron its non-stick surface. Clean the pan the wrong way and you can strip that layer. Lose the seasoning and you lose rust protection and non-stick performance. The good news is this: you can clean cast iron thoroughly without harming the seasoning. You don’t need fancy tools or harsh chemicals. With a few simple steps, you’ll protect the seasoning and get great results every time you cook.
In this guide, I’ll show you exactly how to clean cast iron without removing seasoning. We’ll cover what seasoning is and why it matters. I’ll share hands-on fixes for stuck food, sticky buildup, and rust. You’ll also get expert tips, product suggestions, and a list of common mistakes to avoid.
By the end, you’ll feel confident caring for your cast iron skillet, Dutch oven, or griddle so it stays in excellent shape for years.
Understanding Cast Iron Seasoning
Before we go into cleaning steps, let’s define seasoning. Seasoning is not a spice. It’s a thin, polymerized layer of oil that bonds to the metal when heated. This layer creates a natural barrier. It stops rust and builds a non-stick surface over time.
Here’s how seasoning works:
- When you heat oil past its smoke point on cast iron, the oil polymerizes and bonds to the metal.
- Each time you cook with oil, the layer grows stronger and smoother.
- Well-seasoned pans look shiny and black. They feel slick to the touch and release food easily.
Harsh cleaning can damage this layer. Long soaking, strong detergents, or heavy abrasives will strip seasoning. Avoiding those mistakes keeps your pan healthy.
Why Seasoning Matters
A well-seasoned pan brings three big benefits:
- Prevents rust: The oil coating blocks moisture from reaching the iron.
- Reduces sticking: Food releases easily with little added fat.
- Improves with use: Each cook adds polymerized oil and strengthens the surface.
If the seasoning wears away, you must re-season. That takes time. So gentle cleaning is worth it.
The Right Tools For Cleaning Cast Iron
Use the right tools and cleaning becomes fast and safe. You don’t need special equipment. Most of these are already in your kitchen.
Essential Cleaning Tools
1. Soft Sponge Or Brush
A non-abrasive sponge or a stiff-bristle brush removes debris without scratching the seasoning. I use a nylon brush for daily jobs.
2. Chainmail Scrubber
A stainless steel chainmail scrubber tackles stuck food while protecting the seasoned surface.
*Amazon suggestion: The Ringer Original Stainless Steel Cast Iron Cleaner*
3. Plastic Scraper
Plastic scrapers lift stubborn bits without abrasion. They’re great for stuck-on batter or softened grime.
4. Paper Towels Or Lint-free Cloth
Use these to dry the pan and to rub in a thin layer of oil. I keep a stack by the stove.
5. Mild Dish Soap (optional)
Modern, well-seasoned cast iron can handle small amounts of mild soap. Use soap sparingly and only when needed.
6. Kosher Salt
Coarse kosher salt is a safe, natural abrasive for scrubbing without stripping seasoning.
Avoid steel wool, harsh scouring pads, and dishwashers. They remove seasoning fast.
Step-by-step: How To Clean Cast Iron Without Removing Seasoning
Cleaning cast iron is straightforward if you follow a reliable routine. Below is the method I use most often. It works for daily cleaning after frying, searing, or baking.
1. Let The Pan Cool Slightly
Never douse a hot cast iron pan with cold water. Rapid cooling can warp or even crack the pan. Let it cool until it’s warm to the touch.
2. Wipe Away Leftover Food
While the pan is still warm, wipe out oil and food bits with a paper towel or lint-free cloth. This removes most residue with no scrubbing.
3. Rinse With Warm Water
Rinse under warm running water. Use your sponge, brush, or chainmail scrubber to remove stuck food. Do not soak the pan. If food is stubborn, add kosher salt and scrub gently.
4. Use Soap (if Needed)
Usually soap isn’t necessary. If the pan is greasy or you cooked something very sticky, a few drops of mild dish soap are fine. Rinse well to remove all soap residue.
5. Dry Completely
Moisture is the enemy of cast iron. Dry thoroughly with a towel. Then place the pan on a low burner for a minute or two to evaporate any remaining water.
6. Apply A Thin Layer Of Oil
While the pan is warm, add a few drops of neutral oil (canola, grapeseed, or flaxseed). Rub it across the inside and outside with a paper towel. Buff off excess so the surface is barely glossy, not greasy.
7. Store Properly
Store in a dry place. If you stack pans, put a paper towel between them. That protects the seasoning and keeps moisture away.
Dealing With Common Cast Iron Cleaning Challenges
Sometimes you face tougher messes: burnt food, sticky residue, or rust. Here are safe fixes that keep the seasoning intact.
Stuck-on Food
If food won’t come off with regular cleaning:
- Pour a tablespoon of kosher salt into the pan.
- Add a small amount of water to make a paste.
- Scrub with a paper towel, sponge, or chainmail scrubber.
- Rinse and dry as usual.
Kosher salt acts as a gentle, natural abrasive. It cleans without removing seasoning.
Sticky Residue
Sticky pans usually come from too much oil during seasoning or storage. To fix this:
- Scrub with hot water and a chainmail scrubber.
- Dry thoroughly.
- Place the pan in a 400°F oven for 10 minutes to burn off excess oil.
- Wipe out any remaining oil with a paper towel.
Light Rust
If you see small rust spots:
- Scrub the rusted area with a bit of kosher salt and a damp cloth.
- Dry the pan completely with heat.
- Rub with oil and heat on the stove for 10 minutes.
For deeper rust you may need to re-season. But light rust is usually easy to fix if you act quickly.
Burnt Food
To loosen burnt-on food:
- Fill the pan with a small amount of water.
- Bring to a gentle simmer for 2–3 minutes.
- Use a scraper or brush to lift off the food.
- Dry and oil as usual.
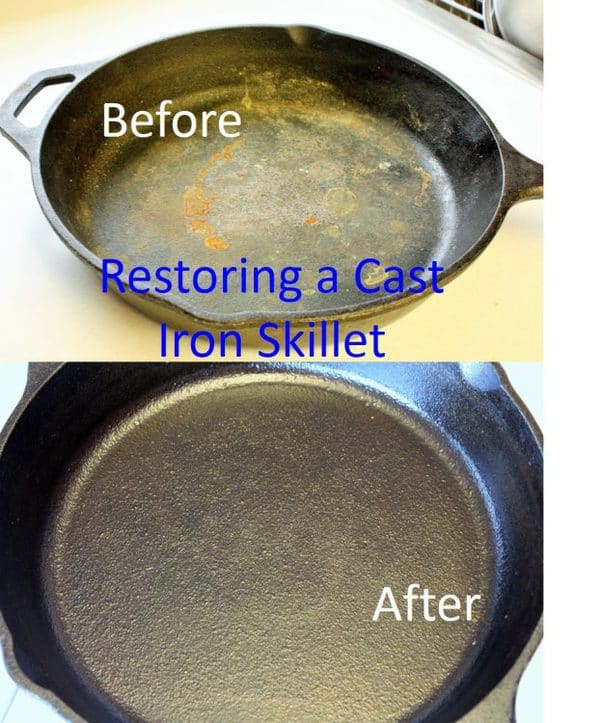
Credit: www.sustainablecooks.com
What Not To Do: Common Mistakes
Even experienced cooks slip up. Avoid these common errors:
1. Soaking In Water
Extended soaking causes rust and strips seasoning. Don’t leave your pan in the sink.
2. Using The Dishwasher
Dishwashers use strong detergent and long water exposure. That destroys seasoning.
3. Scrubbing With Steel Wool
Steel wool removes seasoning and scratches the surface. Use it only if you plan to re-season afterward.
4. Leaving It Wet
If you put a damp pan away, it will rust. Always dry completely first.
5. Cooking Acidic Foods Often
Tomatoes and vinegar can eat at seasoning. Occasional acidic cooking is fine. Frequent use will wear the surface faster.
6. Adding Too Much Oil After Cleaning
Too much oil creates a sticky film. After oiling, always wipe until the pan looks just glossy.
Comparing Cleaning Methods
Different cleaning methods affect seasoning in different ways. Here’s a quick comparison:
| Cleaning Method | Effect on Seasoning | Best For | Risk Level |
|---|---|---|---|
| Warm water & brush | Safe | Daily cleaning | Low |
| Kosher salt scrub | Safe | Stuck-on food | Low |
| Chainmail scrubber | Safe | Tough messes | Low |
| Mild dish soap | Usually safe | Occasional deep clean | Medium |
| Steel wool | Removes seasoning | Rust removal, re-seasoning | High |
| Dishwasher | Destroys seasoning | Never recommended | Very High |

Credit: www.amazon.com
Advanced Tips For Protecting Seasoning
These pro tips make a big difference:
Preheat Your Pan Before Cooking
Heat the pan for a few minutes before adding oil or food. A hot, dry pan reduces sticking and makes cleanup easier.
Use The Right Oils
Not all oils behave the same. From my experience, flaxseed, canola, and grapeseed oil create durable seasoning because they polymerize well at high heat. Olive oil is okay for low-heat cooking but can turn sticky if overheated. Avoid butter for seasoning. It burns and can leave a residue.
Re-season Regularly
Even with careful cleaning, seasoning thins over time. Every few months, add a very thin layer of oil. Bake the pan upside down at 400°F for an hour. This refreshes the surface and fills tiny gaps in the seasoning.
Dry Over Heat
Towel drying is quick, but drying on the stove or in the oven is more reliable. Heat removes hidden moisture and prevents rust.
Avoid “over-seasoning”
More oil is not better. Too much oil builds a gummy layer. After oiling, wipe until the pan looks dry and only slightly glossy.
Best Oils Explained
Here is why I recommend certain oils:
- Flaxseed oil: Very popular for true “hard” seasoning. It polymerizes into a tough layer. Use sparingly and follow the correct bake cycle.
- Canola oil: Neutral, inexpensive, and reliable. Great for regular maintenance.
- Grapeseed oil: Neutral and has a high smoke point. It seasons well.
- Olive oil: Fine for cooking at low to medium heat, but less ideal for building a strong seasoning at high heat.
When To Re-season Your Cast Iron
Sometimes cleaning isn’t enough. Re-season when you see these signs:
- Rust patches that won’t scrub away
- Dull, gray, or rough surface instead of shiny black
- Food sticks badly, even with oil
- Bare metal showing through
If these appear, clean the pan as well as you can. Then follow a full re-seasoning process to restore the non-stick layer.
Full Re-seasoning Process (Detailed Steps)
When your pan needs a reset, here’s a reliable method I’ve used:
- Remove rust and grime: Use steel wool or a heavy-duty scrubber to strip down to bare metal if needed. This is the one time you’ll remove the old seasoning fully.
- Wash and dry: Clean with hot water and mild soap. Dry completely on the stove or in a warm oven.
- Thin oil coat: Apply a very thin coat of your chosen oil inside and out. I use canola for the first few layers.
- Bake: Place the pan upside down in a 400°F oven for 1 hour. Put foil on the lower rack to catch drips.
- Cool and repeat: Let the pan cool in the oven. Repeat the oil-and-bake cycle 2–3 times for a robust finish.
This creates a smooth, durable surface that performs well for searing, frying, and baking.
Cleaning Cast Iron Vs. Other Cookware
How does cast iron care compare to other pans? Here’s a quick view:
| Cookware Type | Cleaning Method | Seasoning Needed | Dishwasher Safe |
|---|---|---|---|
| Cast Iron | Hand wash, no soaking | Yes | No |
| Stainless Steel | Dishwasher or hand wash | No | Yes |
| Nonstick | Hand wash, avoid abrasion | No | Sometimes |
| Aluminum | Hand wash or dishwasher | No | Yes (if not coated) |
Cast iron is unique. It actually improves with use when you care for it. No other common pan gets better with age in the same way.
Practical Example: Cleaning After Frying Eggs
Here’s a real example. I often fry eggs in my skillet. Afterward I do this:
- Let the pan cool for a few minutes.
- Wipe out leftover oil and bits with a paper towel.
- If there’s stuck egg, add a splash of warm water and scrub with a brush.
- If needed, sprinkle kosher salt and scrub gently.
- Rinse briefly and dry with a towel.
- Place on a warm burner for a minute to ensure dryness.
- Add a few drops of oil, rub it in, and store.
This routine keeps my seasoning solid and the pan ready for the next breakfast.
Choosing The Best Products For Cast Iron Care
Not all tools are equal. Here are highly rated, trusted products I recommend:
1. The Ringer Original Stainless Steel Cast Iron Cleaner
A durable chainmail scrubber that cleans well and lasts for years.
2. Lodge Pan Scrapers
Plastic scrapers made for cast iron. Great for removing stuck food without damage.
3. Lodge Seasoning Spray
100% canola oil in a spray. Easy to apply a thin, even layer after cleaning.
4. Oxo Good Grips Cast Iron Brush
Comfortable handle, stiff bristles, and gentle on seasoning. Good for daily cleaning.
When buying, pick tools made specifically for cast iron. Avoid multi-purpose scrubbers that can be too abrasive.
Myths And Misunderstandings About Cast Iron Cleaning
There are many myths. Here are the facts I’ve learned:
- Myth: You can’t use any soap on cast iron.
Fact: A small amount of mild dish soap is fine for modern, well-seasoned pans. It won’t remove seasoning if used gently.
- Myth: Cast iron is hard to clean.
Fact: With the right method, it’s as easy as other pans. The key is short rinses and quick drying.
- Myth: You must never let water touch cast iron.
Fact: Brief rinsing is fine. Just dry immediately and oil lightly.
- Myth: Rust means your pan is ruined.
Fact: Most rust can be removed and the pan restored. Re-seasoning will bring it back to life.
Knowing the facts removes the fear. You can enjoy cast iron without anxiety.

Credit: www.youtube.com
How Long Does Seasoning Last?
Seasoning is not permanent. With good care, it can last for years. Each time you cook with oil you add to the layer. If you avoid harsh cleaning tools and keep the pan dry, the seasoning improves.
However, some foods and mistakes can thin it. Tomatoes and vinegar are acidic. Soaking or steel wool strips the layer. If your pan loses non-stick qualities, follow a re-seasoning routine.
Environmental Benefits Of Cast Iron
Cast iron is a sustainable choice. A well-maintained pan can last decades or longer. That lowers waste compared with disposable nonstick pans. You also avoid some chemical coatings found on modern nonstick cookware.
Storing Your Cast Iron Properly
Storage matters. Keep pans in a dry place. If you stack, put paper towels or cloth between pans. Never store a damp pan. Damp storage is a leading cause of rust.
Cleaning Cast Iron While Camping Or Outdoors
Cast iron is a favorite for camp cooking. Cleaning outdoors is slightly different. Bring a small scraper and a brush dedicated to your camp pan. If water is limited, use sand or clean gravel for scrubbing. Dry the pan over coals or flame and rub in a little oil before packing. This prevents rust on the trail.
Troubleshooting: What If The Pan Starts To Stick?
If food starts to stick more than before:
- Preheat the pan before cooking.
- Use a little more oil while cooking.
- Look for thin, dull, or bare spots—these need re-seasoning.
Most sticking means the seasoning has thinned. With a short re-seasoning cycle, you can restore the non-stick surface.
Quick Reference: Cast Iron Cleaning Dos And Don’ts
Keep this short checklist near your stove:
- Do clean right after use, while the pan is still warm.
- Don’t soak your pan.
- Do dry immediately and completely.
- Don’t use steel wool or harsh scouring pads unless you plan to re-season.
- Do rub in a thin layer of oil after cleaning.
- Don’t store while wet or in a damp place.
- Do re-season when food starts sticking.
Frequently Asked Questions
How Often Should I Oil My Cast Iron After Cleaning?
Oil your pan after every cleaning. Use only a few drops and rub it in well. This keeps seasoning strong and protects against rust.
Can I Use Soap On Seasoned Cast Iron?
Yes. A small amount of mild dish soap is safe for modern, well-seasoned pans. It won’t strip seasoning if used sparingly and rinsed fully.
What Should I Do If My Cast Iron Rusts?
If rust appears, scrub gently with salt or a chainmail scrubber, rinse, and dry thoroughly. Then oil the pan and heat it to restore the surface. For heavy rust, strip and re-season.
Is It Safe To Use Cast Iron For Acidic Foods Like Tomato Sauce?
Occasional acidic cooking is fine. But frequent use can wear the seasoning. If you cook tomato sauce often, either re-season more often or use a different pan for those dishes.
What’s The Best Oil For Seasoning And Maintaining Cast Iron?
Flaxseed, canola, or grapeseed oils are top choices. They polymerize well at high heat and form a stable seasoning. Avoid using butter or olive oil for heavy seasoning work because they can leave sticky residues at high heat.
Caring for cast iron is straightforward. It takes a little attention. In return you get cookware that improves with age. With these tips, your pan will only get better. For more detail on the science behind seasoning, check the Wikipedia Seasoning (Cookware) page. Happy cooking!