How to Season Cast Iron Without Oven: Easy Stovetop Guide 2026

If you love cooking with cast iron but don’t have access to an oven, you might wonder how to season your pan properly. The good news: you can build a strong, nonstick patina right on your stovetop or with simple, low-tech methods. I’ve seasoned many pans this way. With the right oil, heat, and a bit of patience, your skillet will resist rust and release food beautifully. This guide walks you through each step, explains the why, points out common mistakes I’ve seen, and adds tips that save time and frustration.
Why Seasoning Matters For Cast Iron
Seasoning is not a gimmick. It’s a chemical process where oil polymerizes and bonds to the iron. The result is a thin, hard layer. This layer seals the metal. It makes the surface nonstick and protects the pan from rust. It also improves with use. The more you cook, the better the finish becomes.
A well-seasoned pan offers:
- Rust protection: The polymerized oil blocks moisture and air.
- Nonstick surface: Eggs, pancakes, and delicate fish release more easily.
- Better flavor: A long-used pan can add depth to fried and seared foods.
Seasoning is ongoing, not a one-time chore. I always add layers when a pan looks dull or food starts to stick. The first layers matter. They lay the foundation for years of easy cooking.
Seasoning Cast Iron Without An Oven: The Core Methods
You don’t need an oven to season cast iron. Stovetop seasoning works well. So do grills, campfires, and portable burners. Below I give a clear, repeatable stovetop method plus safe alternatives. Follow the steps and you’ll build a durable, nonstick patina.
1. Cleaning The Pan Thoroughly
Start with a clean surface. New pans often have factory oils. Old pans can have rust or sticky residue. Clean well before you season.
- Use hot water and a little dish soap for new or rusty pans. I do this without worry; a good season will follow.
- For heavy rust or old seasoning, scrub with steel wool or a stiff brush until the metal looks even.
- Rinse thoroughly and dry completely. Any leftover water invites rust while you work.
Pro tip: If your pan is rusty, sprinkle coarse salt and scrub. Salt is an effective, gentle abrasive that won’t scar the iron.
2. Choosing The Right Oil
Pick an oil with a high smoke point. Seasoning needs heat. If the oil smokes at a low temperature, it won’t form a good, hard layer.
Popular options:
- Flaxseed oil (favored for a very hard finish)
- Grapeseed oil
- Canola oil
- Vegetable oil
You can also use rendered fats like bacon fat or lard for a traditional taste. Vegetable oils make results more consistent. Avoid extra-virgin olive oil for initial seasoning. Its low smoke point can leave a sticky film.
Quick note on flaxseed: Flaxseed polymerizes to a very hard layer. It can be slightly brittle. I often combine it with another oil in rotation—flaxseed for a base, then grapeseed or canola for regular touch-ups.
3. Applying Oil Evenly
Use a small amount of oil. Too much oil creates sticky, uneven spots. I use about a teaspoon for a 10–12″ skillet.
- Pour a teaspoon into the pan.
- Use a lint-free cloth or paper towel to rub a thin layer over every surface—inside, outside, and the handle.
- Wipe off excess. The surface should have a faint sheen, not droplets.
Common mistake: People leave puddles of oil. That makes a gummy finish. Thin, even coats are the key to a smooth patina.
4. Heating On The Stovetop
Place the oiled pan over a burner upside down. I use medium-high heat. The goal is to heat until the oil reaches its smoke point and begins to polymerize.
- Heat for 10–15 minutes on a typical stovetop. Time varies by burner and pan size.
- Move or rotate the pan if your burner is small. This ensures even heat across the whole surface.
- When the pan just starts to smoke, keep it there for about 10 minutes.
Turn off the heat and let the pan cool naturally. This heat bonds the oil to the iron and forms the seasoning layer.
5. Repeat For Stronger Seasoning
One pass helps. Two to three passes are better. Each cycle adds to the coating and builds a more durable, nonstick surface.
- After cooling, wipe a fresh thin layer of oil and heat again.
- Repeat 2–3 times for a solid base. More layers don’t hurt but use thin coats.
6. Cool Down And Store
Let the pan cool on its own. Wipe away any sticky areas with a dry cloth once cool. Store in a dry spot with the lid off.
Non-obvious insight: Keep the lid off. Trapped moisture invites rust, even on a seasoned pan.
Ventilation And Safety While Seasoning
A smoky pan means your oil is polymerizing. Open windows or run a fan. Smoke detectors may trip. I always turn on my range hood and open a nearby window. Keep a fire extinguisher handy when working at high heat.
Alternative Seasoning Methods Without An Oven
No stovetop? No problem. Here are other ways to season cast iron. These methods work well and can even reach higher temperatures than a home stove.
Using A Grill
An outdoor grill is like a big stovetop. Gas or charcoal both work.
- Clean and oil your pan as above.
- Place it upside down on the grill grates.
- Heat for 30–40 minutes with the grill lid closed.
- Open the lid and let it cool before removing.
Grills can reach higher temps. Watch for hot spots and rotate the pan if needed.
Over A Campfire
Campfire seasoning works if you’re careful. I use it when camping or traveling with cast iron.
- Build a steady fire with glowing coals and low flames.
- Place the oiled pan near, not directly in, the hottest zone.
- Rotate every 10 minutes for even heat.
- After 30–40 minutes, remove with tongs and cool naturally.
Safety tip: Wear heat-resistant gloves. Cast iron stays hot a long time.
Using A Hot Plate Or Portable Burner
If you have a hot plate or portable burner, you can season smaller pans this way. It’s handy for dorms or small kitchens.
- Follow the same cleaning, oiling, and heating steps.
- Rotate the pan often if the burner heats unevenly.
Practical tip: If parts of the pan overheat, move it around the burner. Thin spots heat faster, so keep an eye on evenness.
Comparing Seasoning Methods
To help you choose, here’s a quick comparison of non-oven seasoning methods:
| Method | Pros | Cons | Best For |
|---|---|---|---|
| Stovetop | Convenient, fast, easy to monitor | May miss some areas, smoke indoors | Most kitchens |
| Grill | Even heat, high temperature | Requires outdoor space, uses more fuel | Outdoor cooks |
| Campfire | Great for large pans, natural method | Hard to control heat, safety risk | Camping, outdoor use |
| Hot Plate | Portable, accessible | Uneven heating, slower for large pans | Small kitchens, dorms |
:max_bytes(150000):strip_icc()/__opt__aboutcom__coeus__resources__content_migration__serious_eats__seriouseats.com__images__2016__09__20160817-cast-iron-pan-vicky-wasik-collage-1500x1125-a15711a84a054cca9268b8ddda1e5dd2.jpg)
Credit: www.seriouseats.com
Essential Tools And Products For Stovetop Seasoning
You don’t need fancy gear. A few items make seasoning safer and easier. I keep these on hand.
- Paper towels or lint-free cloth: For spreading oil and wiping excess.
- Tongs or heat-resistant gloves: For handling hot pans.
- Scrub brush or steel wool: For cleaning rust or old seasoning.
- High-smoke point oil: Flaxseed, grapeseed, or canola.
Relevant Amazon Product Suggestions
To help you get started, here are a few useful items available on Amazon:
1. Lodge Seasoned Cast Iron Skillet
A popular pan that arrives pre-seasoned. I still add a couple of my own layers for extra durability.
[check It On Amazon](https://www.amazon.com/dp/b00006jsua)
2. Caron & Doucet Cast Iron Oil
A blend made for seasoning. It has a high smoke point and a consistent finish.
[check It On Amazon](https://www.amazon.com/dp/b01eguia2k)
3. Oxo Good Grips Cast Iron Brush
Gentle on seasoning but tough on stuck-on food and light rust. I use a brush like this for regular cleaning.
[check It On Amazon](https://www.amazon.com/dp/b071flswbs)
4. Heat-resistant Silicone Gloves
These protect your hands when you move hot pans. They’re essential if you season outside or use a grill.
[check It On Amazon](https://www.amazon.com/dp/b07qh8f2fq)
Common Mistakes When Seasoning Without An Oven
I’ve seen cooks, even experienced ones, make the same avoidable mistakes. Learn from these so you get a smooth finish fast.
1. Using Too Much Oil
Less is more. Thick layers turn sticky. Use thin coats and build up slowly.
2. Not Heating The Pan Enough
The oil must reach its smoke point. If it doesn’t, it won’t bond. Wait for smoke before you stop heating.
3. Skipping The Sides And Handle
Rust and food touch every surface. Season the sides, bottom, and handle too.
4. Using The Wrong Oil
Low smoke point oils like extra-virgin olive oil can leave a gummy layer. Pick a high-smoke point oil.
5. Not Repeating The Process
One treatment helps, but multiple thin layers yield a long-lasting patina.
6. Not Cleaning The Pan First
Old residue and rust block bonding. Start with a spotless pan and dry it fully.
7. Rushing The Cooling Step
Let the pan cool on its own. Washing or moving it too soon can damage the new layer.
How To Know If Your Pan Is Properly Seasoned
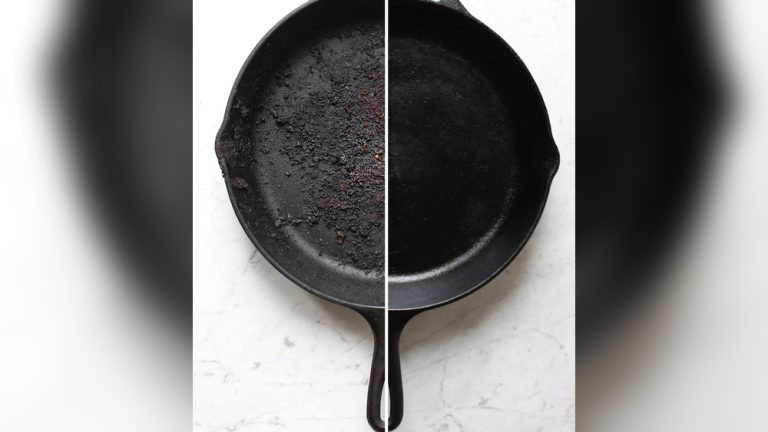
A good seasoning looks smooth and dark—black or deep brown. Food should release easily. The surface should not feel sticky.
Simple test: Fry an egg with a small amount of oil. If the egg slides and doesn’t stick, your seasoning is solid.
If you see rust, dull spots, or sticking, add thin layers or touch up the problem areas.
Caring For Your Cast Iron After Seasoning
Seasoning is the start. Good care keeps your pan in top shape. I follow a short routine after every use.
Cleaning After Use
- Clean while the pan is still warm.
- Wipe out crumbs with a paper towel.
- For stuck bits, use coarse salt and a bit of water, scrub, then rinse and dry immediately.
- Never soak or put cast iron in the dishwasher.
Drying And Oiling
After washing, dry fully. I set the pan on low heat for a few minutes to evaporate moisture. Then I wipe a thin layer of oil before storing.
Storing Properly
Store in a dry spot with the lid off. If you stack pans, place paper towels between them to avoid scratches.
Non-obvious tip: In humid areas, place a small silica gel packet near your pans. It helps absorb moisture and cut rust risk.

Credit: www.youtube.com
Troubleshooting Common Problems
Even with care, issues can appear. Here’s how I fix the usual problems quickly.
Rust Appears
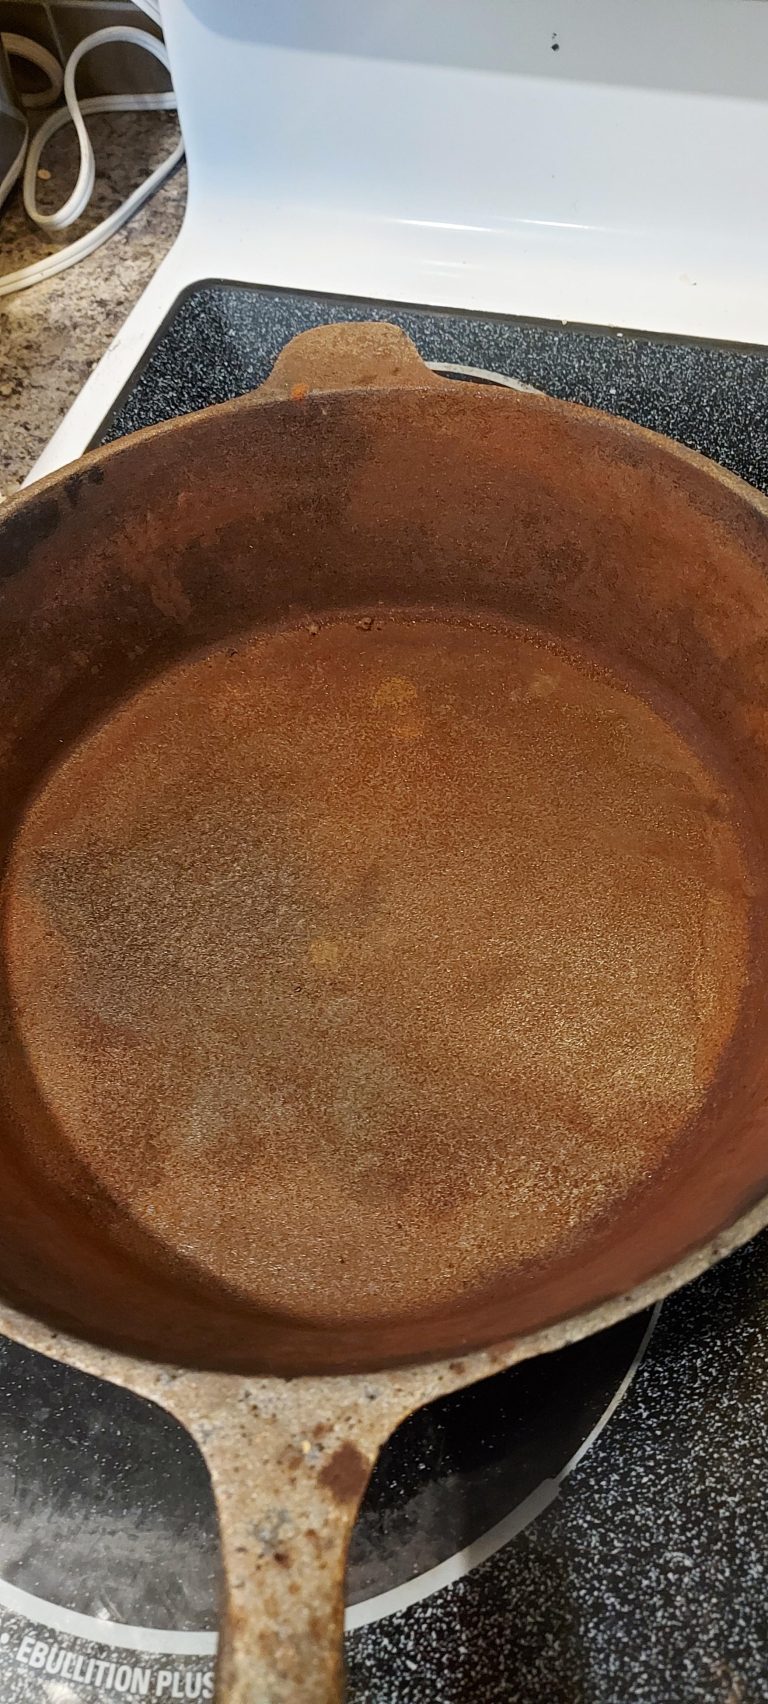
Don’t panic. Scrub the rust off with steel wool. Wash, dry, and reseason. Rust is reversible if you act early.
Sticky Or Gummy Surface
This usually means too much oil or not enough heat. Wash with hot water and a little soap, dry, and reseason with thinner coats.
Flaky Or Peeling Seasoning
If the layer flakes, it was too thick or poorly bonded. Scrub loose bits away and reseason with thin, even layers.
Uneven Color
New pans often look patchy. Regular cooking and additional seasoning cycles will even the color over time.
When To Strip And Start Over
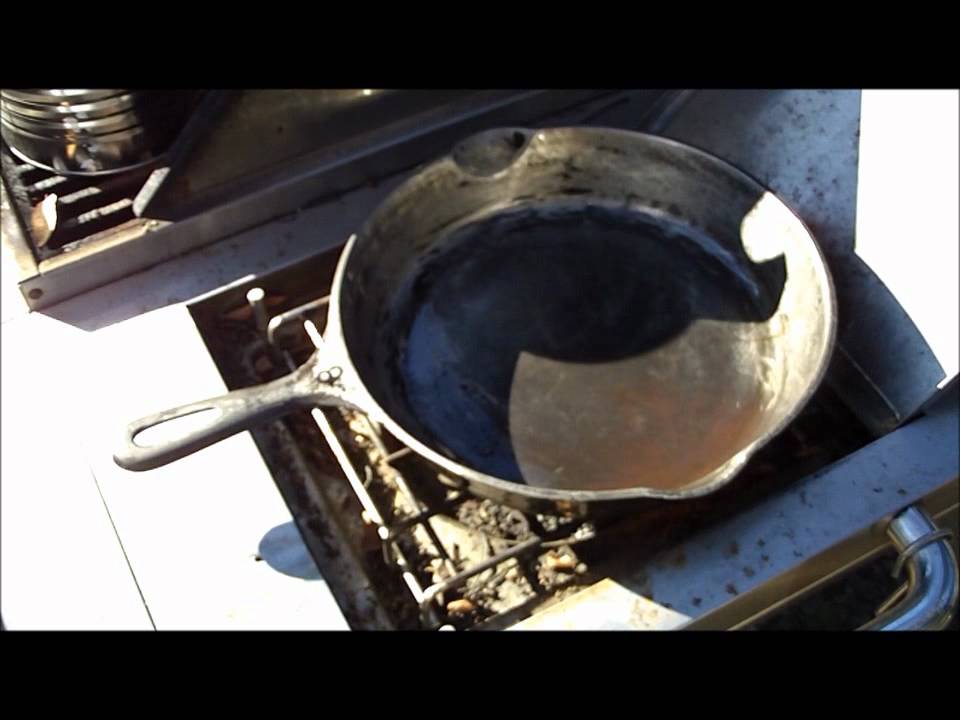
If the pan has thick, flaky build-up or a gummy coat you can’t fix, strip it down. Use steel wool and hot water to remove layers, then dry and start the seasoning process fresh. I’ve stripped an old thrift-store skillet this way and rebuilt its patina from scratch—works every time.
Can You Season Cast Iron With Just Cooking?
Yes. Every time you cook with oil or fat you add to the seasoning. Frying bacon, searing steak, or making pancakes all help build the layer. Still, I recommend the initial stovetop seasoning to give the pan a reliable base. After that, normal cooking maintains and improves the patina.
Pro tip: After your first seasoning, cook bacon, fried chicken, or pancakes. These foods add useful, tasty layers to the coating.
Seasoning Cast Iron Without Oven: Step-by-step Summary
Here’s a quick reference to keep handy:
- Clean your pan thoroughly.
- Dry completely.
- Apply a thin layer of high-smoke point oil.
- Heat on stovetop or grill until the pan smokes.
- Cool naturally.
- Repeat 2–3 times for best results.
- Cook with oil regularly to maintain seasoning.
Comparing Oils For Stovetop Seasoning
Choosing the right oil matters. Here’s a quick guide:
| Oil | Smoke Point (°F) | Flavor Impact | Seasoning Quality |
|---|---|---|---|
| Flaxseed | 225-250 | Neutral | Very hard, durable |
| Grapeseed | 420 | Neutral | Excellent, smooth |
| Canola | 400 | Neutral | Good, easy to find |
| Vegetable | 400-450 | Neutral | Good, affordable |
| Bacon fat/lard | 370 | Rich, savory | Traditional, but can go rancid |
Why Flaxseed Smoke Point Looks Low Here
Flaxseed’s listed smoke point can seem low. But it polymerizes into a very hard coating at lower temperatures. That makes it popular for a durable finish. Use thin layers and patience. If you prefer simpler steps, grapeseed or canola are both reliable and forgiving.
Why Some Experts Still Prefer Oven Seasoning
Oven seasoning is popular because the heat surrounds the pan evenly. That makes it easy to get a uniform layer. But you can match those results without an oven. Stovetop, grill, and campfire methods work well when you control heat and use thin coats. For small spaces or if you want to avoid heating your whole kitchen, stovetop and grill methods are excellent choices.
For more on the science of cast iron seasoning, see this Wikipedia page on cookware seasoning.
FAQs For How to Season Cast Iron Without Oven
How Often Should I Season My Cast Iron Pan?
Season when the pan looks dull, shows rust, or food starts sticking. Many cooks do a light seasoning every few months. Regular cooking with oil also keeps the seasoning in good shape.
Can I Use Olive Oil For Seasoning Cast Iron Without An Oven?
Olive oil is not ideal due to its low smoke point. It can leave sticky spots. Use flaxseed, grapeseed, or canola for better results.
Is Stovetop Seasoning As Effective As Oven Seasoning?
Yes. Stovetop seasoning can match oven results if you heat evenly and use the right oil. It may need a bit more attention to avoid hot spots, but it works well for most pans.
What Should I Do If My Cast Iron Starts To Rust?
Scrub the rust off with steel wool or a stiff brush. Wash, dry, and reseason the pan. Rust is common and easy to fix if you act early.
Do I Need To Season New Pre-seasoned Cast Iron?
Yes. Even pre-seasoned pans benefit from extra layers. Adding your own seasoning makes the surface more nonstick and more durable.
Seasoning cast iron without an oven is simple, flexible, and effective. With the right oil, heat, and a little practice you’ll have a pan that cooks beautifully and lasts a lifetime. Whether you live in a small apartment, are camping, or just want to avoid heating your oven, these stovetop and alternative methods will get your cast iron ready for great meals.
Credit: www.youtube.com