How long do you have to season a cast iron skillet for results

Mastering how long to season a cast iron skillet is key to its performance and longevity. This comprehensive guide covers everything from the multiple initial layers required for new or restored pans to the regular, ongoing maintenance seasoning that keeps your skillet naturally non-stick and rust-free. You’ll learn the ideal techniques, proper oils, and how consistent care transforms your cast iron into an irreplaceable kitchen workhorse.
How Long Do You Have to Season a Cast Iron Skillet for Results
Ah, the beloved cast iron skillet! It’s more than just a piece of cookware; it’s an heirloom, a reliable workhorse, and a source of countless delicious meals. But if you’re new to the world of cast iron, or perhaps just looking to improve your skillet’s performance, one question often comes up: “How long do you have to season a cast iron skillet for results?”
The answer isn’t a simple number of minutes or hours. Seasoning cast iron is both an art and a science. It needs an initial investment of time and then steady upkeep. It’s not a one-and-done job. Instead, it’s a process that improves with every use.
In this guide I’ll break down what seasoning really is, how long each step takes, how many layers to aim for, and the practical ways I keep my pans performing. By the end, you’ll have a clear plan to build a strong, long-lasting seasoning and avoid common mistakes.
Understanding Cast Iron Seasoning: The Foundation
Before we dive into timing, let’s be clear about what seasoning means. When we say we’re seasoning a cast iron skillet, we’re talking about polymerization. That’s when a thin layer of cooking oil is heated past its smoke point. The oil breaks down and bonds with the metal. The result is a hard, slick layer that protects and improves the pan.
That layer does four main things:
- Creates a Non-Stick Surface: A good seasoning keeps food from sticking and makes cooking easier.
- Protects Against Rust: The sealed surface keeps moisture away from raw iron and prevents oxidation.
- Imparts Flavor: Over time, the pan develops flavor depth from repeated cooking.
- Makes Cleaning Easier: A well-seasoned pan wipes clean with less scrubbing.
So, when we ask how long you have to season a cast iron skillet, we’re really asking how long it takes to build these polymerized layers and then maintain them.
Initial Seasoning vs. Maintenance Seasoning
Put simply, there are two kinds of seasoning work:
Initial Seasoning (for New or Stripped Pans)
This is the deeper process for a bare pan. If your skillet is new and uncoated, or if you stripped an old pan down to bare metal to remove rust or flaky seasoning, you need multiple thin layers to build a base. This takes more time up front.
Maintenance Seasoning (for Ongoing Care)
This is lighter and more frequent. After cooking and cleaning, you do quick touch-ups. These keep the surface smooth and rust-free. Think of maintenance seasoning as small, regular investments that prevent big problems later.
Factors Affecting How Long You Season a Cast Iron Skillet
A few things change how long the process will take:
- The Condition of Your Skillet: A new, factory pre-seasoned skillet (like many Lodge pans) needs less work than a restored, rusty skillet.
- Your Chosen Oil: Oils have different smoke points and polymerization behavior. I’ll cover the best oils below.
- Oven Temperature: Proper polymerization needs steady heat—typically 450–500°F (232–260°C).
- Number of Layers: More layers equal more time. But thin and even layers are far better than thick, sticky coats.
Step-by-Step Guide: How to Season a New or Bare Cast Iron Skillet

This process focuses on building that crucial initial foundation. We’ll use the oven method for even, reliable seasoning. If you need alternatives, see my notes on oven-free methods below.
Step 1: Clean Your Skillet Thoroughly
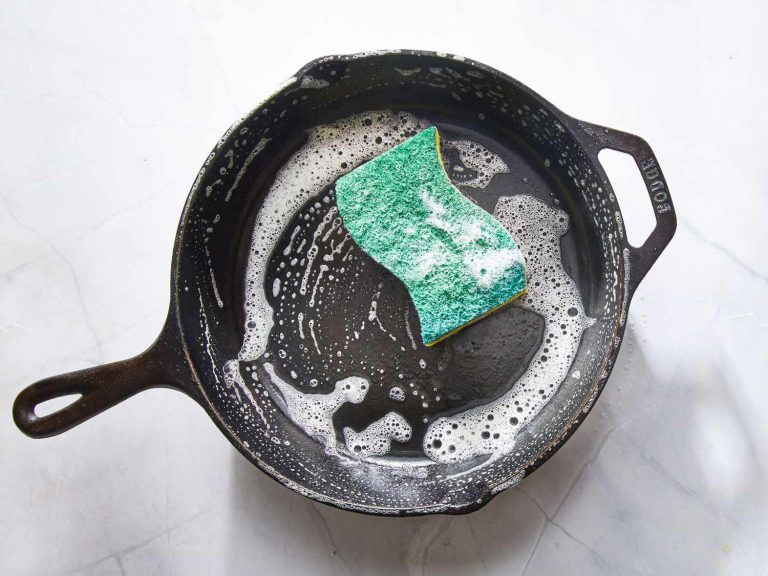
Even new pans can have factory grease or residues. For a new skillet, wash it with warm water and a bit of dish soap. Scrub with a stiff brush. Rinse well.
If your skillet is rusty, you’ll need to restore it first. That can mean aggressive scrubbing or an electrolysis bath to get to bare metal. The goal is a clean, dry surface before you season.
Step 2: Dry Your Skillet Completely
Moisture blocks seasoning and causes rust. Dry the pan on the stovetop over low heat for 5–10 minutes, or in a warm oven, until all steam stops. Make sure it’s fully dry before oiling.
Step 3: Choose the Right Seasoning Oil
Pick a high smoke point oil that polymerizes well. Good options include:
- Grapeseed oil
- Flaxseed oil
- Vegetable oil
- Canola oil
- Avocado oil (more costly, high smoke point)
Avoid olive oil and butter for oven seasoning. Their low smoke points can leave sticky residue instead of a hard layer.
Step 4: Apply a Very Thin Layer of Oil
Use a paper towel or lint-free cloth and rub a thin, even coat on every surface: inside, outside, handle, and bottom. Think “feather-light.” I usually start with a small amount and add only if needed.
Step 5: Wipe Off All Excess Oil
This matters more than most people expect. Wipe until the oil is nearly invisible. Excess oil leads to sticky, gummy layers. I wipe twice and then do one more pass.
Step 6: Bake the Skillet Upside Down in the Oven
Preheat your oven to 450–500°F (232–260°C). Put foil or a sheet on the bottom rack to catch drips. Place the skillet upside down on the middle rack. Upside down prevents pooling and ensures an even film.
Step 7: Bake for One Hour
Once your oven hits temperature, bake for one hour. The oil will polymerize and bond to the iron. Some smoke can occur—open a window if you need to. This one-hour bake is a standard step in the oven seasoning method.
Step 8: Cool Down Slowly
Turn the oven off and let the skillet cool inside with the door ajar. Slow cooling helps the layer set and harden. Cooling can take 1–2 hours or more depending on your environment.
Step 9: Repeat for Multiple Layers
For a new or stripped pan, do 3–5 rounds of steps 4–8. Each round adds durability and improves non-stick performance. That means:
- Baking time: 3–5 hours total (1 hour per layer)
- Cooling time: 3–10 hours total (1–2 hours per layer; you can leave pans overnight between layers)
A focused afternoon or a weekend can build a strong initial seasoning. Don’t rush the wiping or heating steps—thin coats win every time.
How Many Layers Do You Need?
Start with 3–5 initial layers. That gives you a solid base. But the best seasoning develops over months and years with regular cooking. I’ve seen pans with 10–20 layers that outperform freshly seasoned ones. Think of it like painting: many thin coats beat one thick coat.
Ongoing Maintenance Seasoning: The Secret to Longevity
Initial seasoning builds the foundation. Ongoing maintenance keeps it strong. This is the most important part of how to care for your cast iron skillet.
After Every Use: The Quick Re-Season
After cooking, clean with warm water and a stiff brush or scraper. A tiny bit of soap is fine for a well-seasoned pan. Dry the pan completely on the stove. While it’s warm, rub a very thin layer of oil on the surface and wipe off excess. This simple habit protects against rust and slowly builds seasoning.
Deep Maintenance: Every Few Months or As Needed
If the surface looks dull, food sticks more, or rust appears, do a deeper re-season. Repeat the full oven method (Steps 4–8) for 1–2 layers. Do this every few months, or more often if you cook acidic foods like tomatoes frequently, which can strip seasoning.
Signs of a Well-Seasoned Skillet
How do you tell if your skillet is properly seasoned?
- Smooth and Shiny: The surface should feel smooth, not rough. A dark, lustrous sheen is a good sign.
- Non-Sticky: Food should release easily. Eggs, pancakes, and seared meats should slide off with little effort. If they stick, add seasoning or adjust technique. See my tips on how to use your cast iron skillet like a nonstick pan.
- Even Color: The cooking surface should be consistently dark. Light patches signal thinner seasoning in those spots.
- Water Beads: After washing, water should bead and run off rather than sit on the surface.
Troubleshooting Common Seasoning Problems
Even careful seasoning can hit snags. Most problems are fixable with a little work.
Sticky or Gummy Surface
This usually means too much oil was applied. The excess didn’t fully polymerize and turned tacky.
Solution: Scrub the sticky area with hot water and a stiff brush or use coarse salt as an abrasive. Re-season with thinner coats and more diligent wiping. Multiple thin oven layers usually fix it.
Uneven Seasoning or Light Spots
Patchy color can come from uneven oiling, inconsistent oven heat, or areas that don’t see as much cooking contact.
Solution: Continue cooking with fats to build up spots. Add a few careful oven layers, paying special attention to an even, ultra-thin oil film.
Flaking or Peeling Seasoning
If the seasoning flakes, it may mean a layer was too thick, the pan wasn’t clean before seasoning, or polymerization failed.
Solution: Scrub away flaky bits with steel wool or a stiff brush. If needed, strip the pan and start fresh. A full re-season can restore a stable surface.
Rust Spots
Rust appears from moisture exposure. Orange or reddish spots mean the iron needs attention.
Solution: Don’t panic. Remove rust following the steps in our guide on how to clean a rusty cast iron skillet. After rust removal, re-season the affected areas or the whole pan.
Tips for Perfect Seasoning and Usage
- Patience is Key: Seasoning improves over time. Don’t expect perfection after one session.
- Cook with Fat: Foods cooked in fat—seared meats, fried eggs, cornbread—help build seasoning naturally.
- Avoid Acidic Foods Initially: Tomatoes, wine, and citrus can strip new seasoning. Wait until the surface is well-established before frequent acidic cooking.
- Hot Water and Scraper for Cleaning: Daily cleaning usually needs just hot water and a scraper or stiff brush. Avoid abrasive cleaners that strip seasoning.
- Always Dry Thoroughly: Dry on the stove over low heat after washing to remove all moisture. This step prevents rust and prepares the pan for a light oil rub. See how to use a cast iron skillet for the first time for more details.
Tools and Materials You’ll Need
Before you start, gather these items. They make the process smooth and safer:
- High-smoke point oil (grapeseed, flaxseed, vegetable, canola, or avocado)
- Paper towels or lint-free cloths
- Stiff brush or chainmail scrubber for cleaning
- Oven-safe gloves or mitts
- Aluminum foil or a baking sheet to catch drips
- Stove or oven for drying and heat-cycling
Quick Oven-Free Methods (When You Can’t Use an Oven)
Sometimes an oven isn’t an option. You can still build seasoning on the stovetop or with a grill. These methods take longer and may be less even, but they work in a pinch:
- Stovetop Method: Apply thin oil coats and heat the pan over medium-high heat until the oil smokes. Let it cool and repeat several times.
- Grill Method: Place the oiled pan upside down on a hot grill. Close the lid and heat for 30–60 minutes per layer.
Both methods benefit from thin coats and good ventilation. Expect more frequent re-seasoning compared with the oven method.
Seasoning Timeline At-a-Glance
Here is a compact timeline you can follow:
- Initial Build (New or Stripped Pan): 3–5 oven rounds. Each round: 1 hour bake + 1–2 hours cool. Total active bake: 3–5 hours. Total elapsed time: a day or a weekend.
- Maintenance: After every use: clean, dry, and apply a thin oil wipe. Deep re-season: 1–2 oven rounds every few months or as needed.
- Long-term: Expect seasoning to improve with months and years of regular use—10–20 layers over time is common.
Common Mistakes to Avoid
- Applying too much oil. This causes sticky residue.
- Skipping drying. Moisture leads to rust and poor polymerization.
- Using the wrong oil. Low smoke point oils can gum up the surface.
- Rushing the process. Thin coats and cool-downs matter.
Conclusion
So, how long do you have to season a cast iron skillet for results? For a reliable foundation, plan on at least 3–5 oven seasoning rounds. Each round includes about 1 hour of baking time plus cooling. That’s 3–5 hours of active baking and several hours of cooling spread over a day or two.
But seasoning is an ongoing commitment. Regular use, small maintenance oil rubs, and occasional re-seasoning are what turn a simple iron pan into an exceptional kitchen tool. Be patient, use thin coats, and cook with fat. Over time your cast iron will reward you with superb non-stick performance, even heat, and lifelong durability. Embrace the journey—I still enjoy the small satisfaction of a perfectly seasoned skillet after a few months of steady use.