How to Recondition Cast Iron Cookware: A Step-by-Step Practical Guide

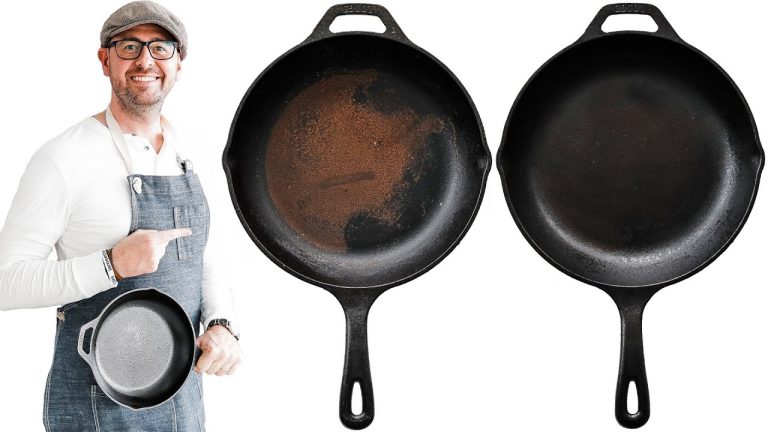
Hi, I’m Daniel Cross. If you have ever found an old, rusty skillet at a garage sale or pulled an orange, flaky cast iron pan out from the back of your pantry, you might think it is ready for the trash. I used to think the exact same thing. Years ago, I almost threw away a skillet my family passed down to me because it was covered in surface rust and baked-on grease. I assumed once the slick black surface was gone, the pan was completely ruined.
The great news is that real cast iron cookware is almost impossible to destroy. Unlike thin nonstick pans with delicate synthetic coatings that scratch and peel, heavy cast iron is solid, durable metal all the way through. Knowing how to recondition cast iron cookware allows you to strip away old rust, clean off years of burnt oil, and rebuild a fresh, naturally slick nonstick seasoning layer right in your home oven.
In this guide, I will walk you through the entire process step by step. We will cover what basic tools you need, how to safely remove stubborn rust without damaging the metal, and how to bake on a beautiful new seasoning coat. Whether you are fixing a neglected skillet or setting up a budget-friendly home kitchen, this straightforward process will bring your favorite pan back to life.
Quick Answer
To recondition cast iron cookware, start by scrubbing away all surface rust and old food residue using hot water, mild dish soap, and fine steel wool. Next, soak the pan in a simple mixture of equal parts warm water and white vinegar for 30 to 60 minutes if heavy rust remains. Once clean, dry the iron completely with a towel and warm it on the stove to remove lingering moisture. Finally, rub a very thin coat of high-smoke-point oil (like canola or grapeseed oil) over the entire surface, wiped almost completely dry, and bake the cookware upside down in your oven at 450°F for one hour to bake on a fresh layer of seasoning.
What Home Cooks Should Know About Cast Iron Reconditioning
Before you start scrubbing, it helps to understand what reconditioning actually means. Reconditioning is different from daily maintenance. Daily maintenance simply means rinsing your pan after dinner and rubbing a drop of oil onto the surface. Reconditioning is a deep restore. You do this when a pan has extensive rust, deep scratches, flaking layers of black crust, or when you buy used cookware and want a clean slate.
Cast iron is an iron-carbon alloy. When bare iron meets moisture and air, it reacts and forms iron oxide, commonly known as rust. Seasoning is not paint or synthetic chemical coating. It is vegetable oil or fat that has undergone a natural chemical process called polymerization. When oil is heated past its smoke point in the presence of iron, it transforms from a liquid fat into a hard, slick plastic-like protective layer. This layer seals the metal against air and moisture to block rust and keep food from sticking.
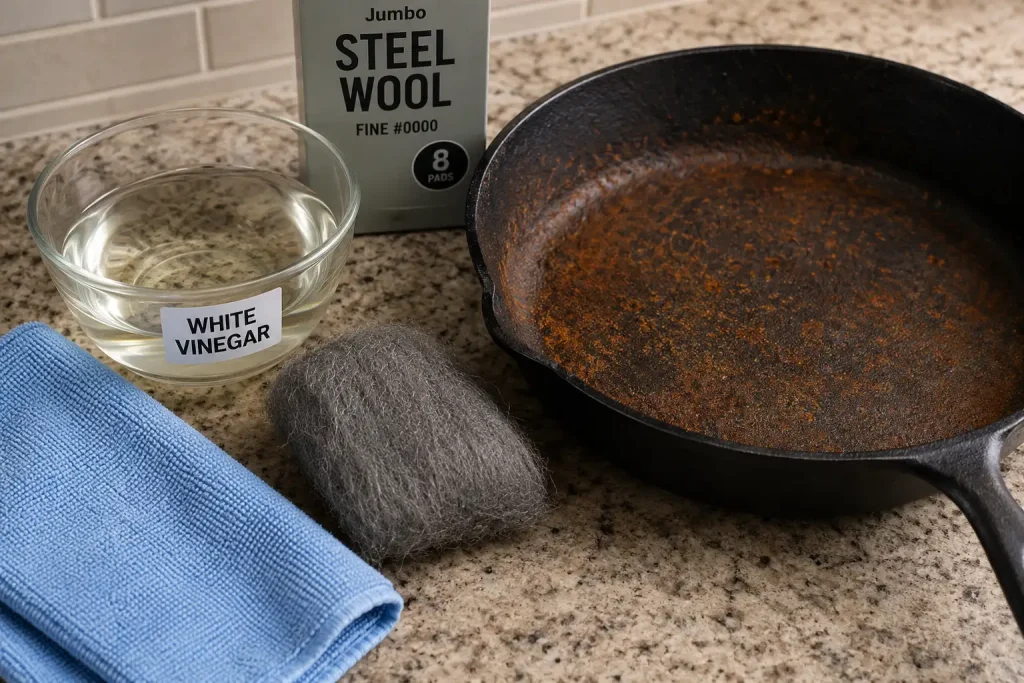
Here are a few essential kitchen tools and supplies you need to collect before starting your cast iron restoration:
- Scrubbing tools: Fine steel wool (Grade 0 or Grade 00), a stiff-bristle nylon brush, or a chainmail scrubber.
- Cleaning agents: Standard dish soap and regular household white vinegar.
- Drying cloths: Clean lint-free cotton towels or sturdy paper towels.
- Cooking oil: Neutral, high-smoke-point oil such as canola oil, grapeseed oil, or vegetable oil.
- Heat safety gear: Heavy-duty silicone oven mitts or thick heat-resistant kitchen pads.
- Oven setup: Standard baking sheet lined with aluminum foil to catch excess oil drips.
Understanding these basic supplies makes the whole process smooth. Restoring old pans is a classic skill that saves money on expensive new kitchen tools while giving you high-performing cookware for meal prep and family dinners.
Daniel’s Kitchen Tip: Don’t be afraid to use mild dish soap during the reconditioning phase! While old kitchen folklore says soap ruins cast iron, modern soap does not contain harsh lye. Using soap to strip away grease and wash off rust particles while restoring a pan is completely safe and helpful.
Signs You Should Recondition Your Cast Iron Pan
How do you know if your pan needs a full recondition or just a quick wash and oiling? Sometimes a pan just needs a gentle scrub, while other times it requires stripping down to bare metal. Recognizing the condition of your metal keeps you from doing unnecessary work.
Here is a helpful chart comparing common cast iron issues, what causes them, and the correct action to take:
| Pan Condition | Main Cause | Recommended Action |
|---|---|---|
| Light red or orange surface dusting | Air exposure after washing without drying | Scrub with soap, dry thoroughly, and apply a quick stove-top oil layer. |
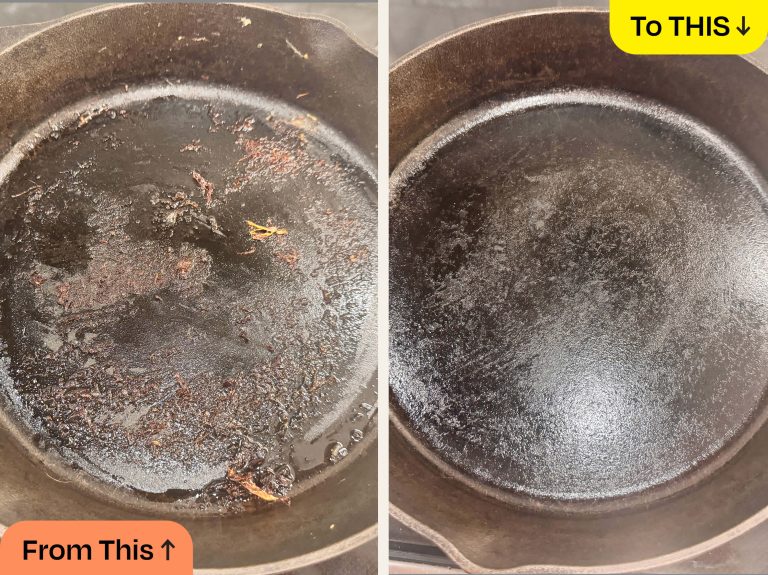
| Flaking black flakes into your food | Burnt food buildup or weak seasoning layers | Full recondition: scrub off loose layers with steel wool and re-season in the oven. |
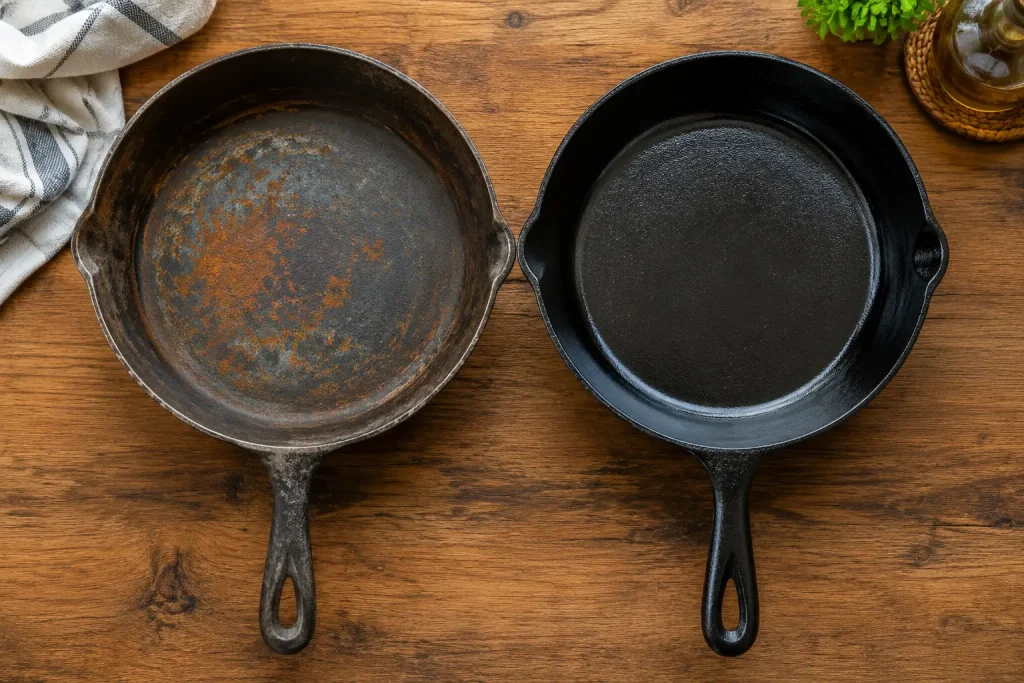
| Deep red rust and rough pitted metal | Long-term exposure to water or damp storage | Vinegar soak for 30–60 minutes, scrub to bare iron, and complete 2–3 oven seasoning cycles. |
| Sticky or gummy surface feeling | Too much oil applied during seasoning | Bake upside down at 450°F for an hour to harden the oil, or scrub off excess and re-bake. |
| Visible cracks or chipped metal edges | Thermal shock or dropping heavy iron | Retire the pan. Cracks weaken structural strength and cannot be safely repaired. |
If your pan has minor surface rust, you can usually fix it in twenty minutes. If it has deep rust spots or peeling crust, following the full step-by-step restoration below is your best path forward.
Kitchen Safety Note: Always check old cast iron cookware for cracks, deep structural splits, or loose handles before spending time reconditioning it. Never try to weld or solder cracked cookware at home. If you notice structural damage, stop using the pan for cooking immediately to avoid heat fractures or oil leaks on hot stovetops.
How to Recondition Cast Iron Cookware Step by Step
Restoring a pan takes a bit of elbow grease, but the process is simple once you follow these basic steps. Set aside about two hours of total time, though most of that time is hands-off while your oven does the work.
Step 1: Scrub Away the Rust and Old Residue
Place your pan in the kitchen sink. Add a few drops of dish soap and a splash of warm water. Take your fine steel wool and scrub the entire surface vigorously. Work in circular motions across the interior, exterior sides, handle, and bottom base. Do not worry about scratching bare metal at this stage—your goal is to remove every bit of red rust, loose black carbon flakes, and food crust until you see bare gray iron.
Step 2: Use a Vinegar Soak for Heavy Rust (If Needed)
If your pan has thick red rust that steel wool cannot quickly remove, use a white vinegar bath. Mix equal parts warm water and plain white vinegar in a clean basin or clean kitchen sink big enough to submerge the pan. Place the pan in the solution for 30 to 60 minutes. According to cleaning guidelines from consumer safety experts, dilute vinegar mild acids effectively loosen rust without eating away healthy metal. Do not leave the pan in vinegar for longer than 60 minutes, as acidic liquid can eventually pit bare iron.
Step 3: Wash thoroughly and Dry Completely
Rinse the pan completely with warm water to remove all vinegar traces and loose rust particles. Wash it once more with dish soap and water. Towel dry the pan immediately using a lint-free cloth or sturdy paper towel. Bare iron rusts within minutes when wet—a process called “flash rust.” To ensure every drop of moisture evaporates, place the clean, dry pan on your stovetop over low heat for 3 to 5 minutes.
Step 4: Apply a Very Thin Layer of Oil
Preheat your oven to 450°F (232°C). Allow the pan to cool slightly so you can handle it safely. Pour a small drop (about a dime-sized amount) of high-smoke-point oil onto the center of the pan. Using a paper towel, wipe the oil over every inch of the pan—inside, outside, bottom base, and handle. Now, take a clean paper towel and wipe the pan dry as if you made a mistake and applied too much oil. The single biggest mistake beginners make is leaving too much oil on the metal. You want an almost invisible film of oil coating the iron.
Step 5: Bake Upside Down in the Oven
Place a sheet of aluminum foil or a wide baking tray on the bottom rack of your preheated oven to catch any tiny drips. Place your cast iron cookware upside down on the top oven rack. Baking it upside down prevents oil from pooling in the bottom of the pan, which causes sticky black spots. Bake the pan at 450°F for one full hour.
Step 6: Cool Down and Repeat if Necessary
After one hour, turn off the oven and let the pan cool completely inside the oven without opening the door. This slow cooling process allows the oil molecules to bond firmly to the metal. Once cool, inspect the pan. For heavily restored bare iron, repeat Steps 4 and 5 two or three times to build up a deep black layer of initial seasoning.
Common Mistakes to Avoid When Restoring Cast Iron
Restoring kitchen tools should be easy and rewarding. However, a few common mistakes can leave you with sticky surfaces, excess smoke, or ruined seasoning. Here are the top mistakes to avoid:
- Applying too much oil: Leaving a thick layer of oil results in a gummy, sticky, uneven finish that easily attracts lint and burns poorly.
- Soaking in vinegar overnight: Leaving iron submerged in acidic vinegar for hours corrodes the metal, creating deep pitted holes.
- Using lower-tier fats with low smoke points: Avoid butter, extra virgin olive oil, lard with water content, or unrefined coconut oil for initial oven seasoning. They burn at low heat and turn rancid over time.
- Putting cast iron in an automatic dishwasher: Modern dishwasher detergents contain harsh alkali compounds that destroy seasoned iron and cause instant heavy rust.
- Skipping the heat drying step: Relying only on towel drying leaves microscopic water droplets in metal pores, leading to immediate flash rust under your new oil coat.
Practical Kitchen Tips from Daniel
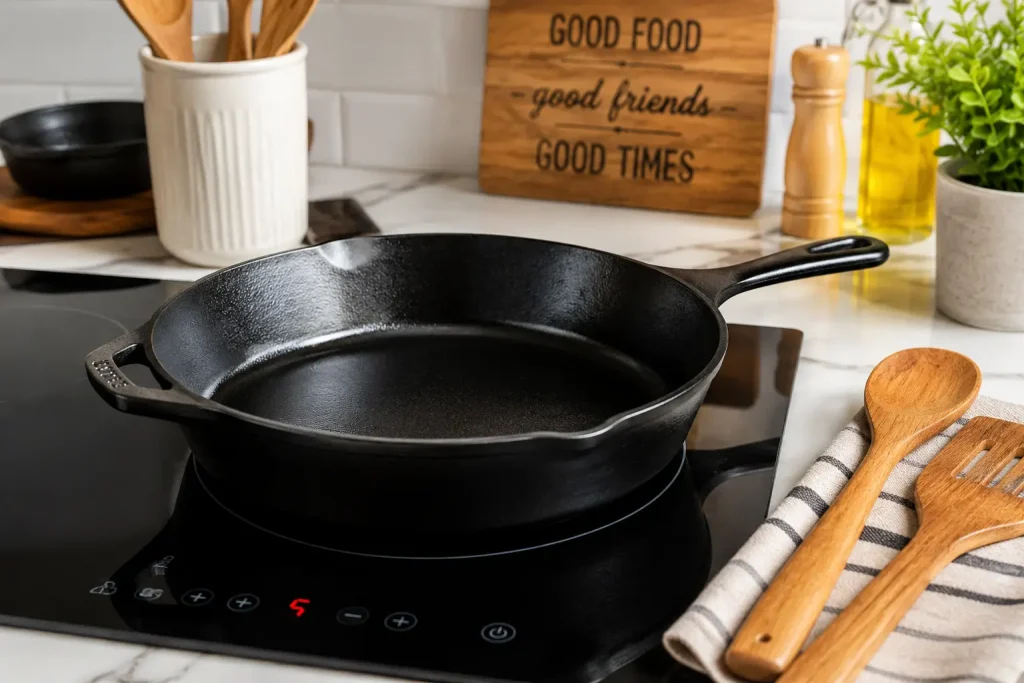
Over the years, I have restored dozens of pans found at yard sales, thrift stores, and family attics. Here are a few practical tips I always share with friends when they ask me about cast iron care:
Choosing the Right Oil
You do not need expensive specialty cast iron seasoning pastes. Plain canola oil, grapeseed oil, or standard vegetable oil from your local grocery store work brilliantly. They have high smoke points (around 400°F to 450°F) and create strong polymer bonds. Grapeseed oil is my personal favorite because it applies smoothly and bakes into a resilient dark finish.
Managing Smoke in the Kitchen
Baking oil at high heat creates some smoke—that is just part of the chemical polymerization process! Turn on your kitchen range hood exhaust fan and open a window while seasoning cast iron in the oven. If you have sensitive smoke detectors near your kitchen, keep an eye on them during the process.
Daily Cooking Builds the Best Nonstick Layer
Oven seasoning creates a great initial foundation, but daily cooking is what makes cast iron nonstick. In the first few weeks after reconditioning your skillet, cook foods rich in healthy fats—like pan-seared bacon, burgers, shallow-fried chicken, or sautéed onions in oil. Avoid cooking highly acidic foods like tomato sauce, simmered lemons, or wine glazes until your pan has several months of solid cooking history.
For more detailed step-by-step guidance on keeping your kitchen cookware organized and clean, check out our guide on practical kitchen cleaning routines to help streamline your weekly chores.
Key Takeaways
- Cast iron cookware is extremely durable and can almost always be restored, even when covered in heavy rust.
- Use steel wool and a 50/50 water-and-vinegar soak (maximum 60 minutes) to eliminate surface rust down to bare iron.
- Always heat-dry washed iron on the stove to avoid instant flash rust before applying oil.
- Wipe oil on the pan and then wipe almost all of it off—ultra-thin layers create the strongest seasoning.
- Bake upside down at 450°F for one hour to lock in a slick, naturally nonstick seasoning coat.
Frequently Asked Questions
Can you use dish soap on cast iron cookware?
Yes, using modern mild dish soap on cast iron is completely safe. Old kitchen rumors about soap ruining pans came from historic soaps containing lye, which stripped seasoning. Modern dish soaps do not contain lye and will not strip properly seasoned iron during quick daily washing or restoration.
What is the best oil to recondition cast iron?
Neutral oils with high smoke points work best for reconditioning cast iron cookware. Grapeseed oil, canola oil, sunflower oil, and general vegetable oil are ideal choices because they polymerize easily at high oven temperatures without becoming rancid.
Why is my cast iron skillet sticky after seasoning?
A sticky skillet means too much oil was applied before baking, or the oven temperature was not hot enough to fully bake the oil layer. To fix sticky seasoning, place the pan upside down in your oven at 450°F for another hour to finish hardening the oil, or scrub away the sticky residue and re-season with a very thin layer.
How long should you soak rusty cast iron in vinegar?
Soak rusty cast iron in a mixture of equal parts water and white vinegar for 30 to 60 minutes. Do not leave cast iron in a vinegar soak for longer than one hour, because acidic vinegar can pit and damage bare iron metal once the surface rust dissolves.
How many times should you season a restored cast iron pan?
When restoring bare iron from scratch, applying 2 to 3 thin layers of oven seasoning gives the best protection. Apply oil, wipe it thin, bake for an hour, let it cool, and repeat the process two or three times before cooking delicate foods like eggs.
Is surface rust on cast iron dangerous?
Surface rust on cast iron is non-toxic iron oxide and is not dangerous in small amounts, but cooking on rusty iron spoils food taste and ruins cooking performance. Scrubbing away rust and reconditioning the pan restores clean, safe cooking performance.
Conclusion
Restoring rusty or neglected cast iron cookware is one of the most satisfying practical skills you can learn for your kitchen. Instead of discarding a pan that looks past its prime, spending a little time scrubbing, oiling, and baking it transforms worn metal into a reliable cooking tool that can last for generations.
Remember, the golden rule of cast iron care is keeping moisture away while building thin, strong layers of heat-baked oil. Once you master this simple process, you can confidently buy vintage iron at flea markets or rescue forgotten family skillets with total confidence.
If you are setting up your kitchen on a budget or upgrading your home cooking setup, explore our complete cookware comparison guide for practical advice on selecting durable skillets, stockpots, and essential baking tools for your daily household needs.