How to Choose Cast Iron Cookware for Your Everyday Kitchen

Hey there, I’m Daniel Cross. If you’re staring at those heavy, dark skillets and wondering how to choose cast iron cookware without making a mistake, you’re in the right place. The cookware aisle can feel like a maze. Smooth pans, bumpy pans, colorful enameled pots, and serious, bare metal skillets all compete for your attention. It’s enough to make any home cook feel overwhelmed.
Here’s the truth. Cast iron is one of the smartest investments you can make for your kitchen. It holds heat like a champ, lasts for generations, and turns out flawless weekend pancakes and weeknight burgers. But pick the wrong type or size, and you’ll end up with a heavy pan that lives in the back of your cabinet.
Let me help you cut through the noise. We’ll break down bare vs. enameled finishes, choose the right size for your stove and your meals, and focus on the practical details that matter day to day. Whether you’re equipping your first apartment or upgrading your meal prep setup, we’ll find the cast iron skillet or Dutch oven that fits your everyday cooking style.
Quick Answer
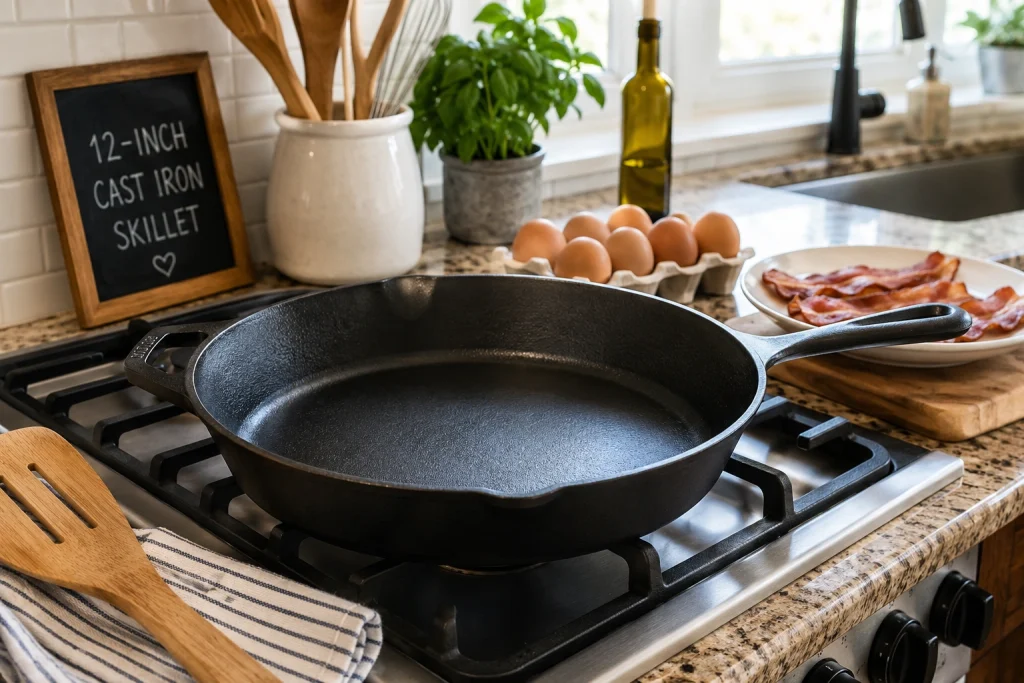
When figuring out how to choose cast iron cookware, your biggest decision is between bare cast iron and enameled cast iron. Bare cast iron is affordable, incredibly durable, and builds a natural nonstick surface, but it requires hand-washing and oiling. Enameled cast iron costs more and handles acidic foods perfectly without seasoning, but the glass-like coating can chip if dropped. For most beginners, a pre-seasoned 10-inch or 12-inch bare cast iron skillet is the best, most versatile, and budget-friendly starting point.
Bonus shortcut from my kitchen: If you mainly sear steaks, fry eggs, bake cornbread, and make stir-fries, get a bare 10- or 12-inch skillet. If you love soups, braises, chili, and tomato-heavy sauces, grab an enameled 5–7 quart Dutch oven. Start there and you’ll cover 90% of weeknight cooking.
What Home Cooks Should Know About Cast Iron
Before you buy, know the two main types. They look different, cook differently, and need different care routines.
- Bare Cast Iron: This is the classic black pan your grandparents used. It’s budget-friendly, nearly indestructible, and it gets naturally slick as baked-on oil builds a layer called “seasoning.” It’s ideal for searing, frying, baking, roasting, and even baking pizza in the oven.
- Enameled Cast Iron: This is cast iron coated in a hard, baked-on glass enamel. It comes in bright colors, won’t rust, and doesn’t need seasoning. It shines for soups, stews, braises, and tomato or wine sauces. The trade-off: it costs more and can chip or crack if you bang it or drop it.
Weight matters, too. Cast iron is heavy. A standard 12-inch skillet can weigh eight pounds empty. Add a big frittata or a pot roast, and you’re doing a forearm workout. Always lift a skillet by the handle in-store if you can, and picture yourself moving it from stove to oven to sink.
That heft is why cast iron cooks so well. Thick iron heats slowly and holds heat. Drop a cold steak in a hot pan, and the pan stays hot. That’s how you get a deep, even sear. Cast iron is great for this, but always use a meat thermometer and follow safe temperature guidelines from the USDA Food Safety and Inspection Service (FSIS) to ensure your food is cooked safely.
Heat Retention vs. Heat Distribution (Why Preheating Matters)
Cast iron holds heat better than most cookware. But it doesn’t heat perfectly evenly at first. That’s normal. Give your skillet 4–6 minutes to preheat on medium to medium-low, and you’ll even out hot spots. I like to add a drop of water to test. If it skitters and evaporates fast, I’m ready to cook.
Cooktop Compatibility and Oven Use
- Gas, electric, and induction: Bare and enameled cast iron work on all cooktops, including induction. The heavy base is actually great for induction stability.
- Glass and ceramic tops: You can use cast iron, but lift—don’t slide—to avoid scratches. Keep bottoms clean.
- Oven and grill: Both types are oven-safe. Enamel brands may list lower max temps than bare iron, so check the manufacturer’s guidelines. Bare cast iron is also perfect for the grill and campfire.
Signs You Picked the Wrong Cast Iron (and How to Fix It)
Sometimes a pan doesn’t match how you cook. If your skillet is frustrating you, it may not be your skills—it may be the wrong tool for the job.

| The Problem You See | What It Means | Practical Solution |
|---|---|---|
| Your pan rusts after every single wash. | You are soaking bare cast iron or air-drying it. | Dry it immediately with a towel and rub a tiny drop of oil on it. Or, switch to enameled cast iron. |
| Your pan is too heavy to lift to wash in the sink. | You bought a 12-inch or 15-inch pan that is too big for your strength. | Downsize to a 10-inch or 8-inch skillet, which is much lighter and easier to manage. |
| The bottom of your pan scratches your glass stove. | The bare iron bottom is too rough, or you are sliding it around. | Pick the pan straight up instead of sliding it, or buy an enameled pan with a smoother base. |
| Tomato sauce tastes like bitter metal. | Acidic foods are eating away the seasoning on your bare cast iron. | Cook acidic foods (like tomatoes or wine sauces) in enameled cast iron instead. |
One more red flag: food sticks no matter what. That usually means your pan isn’t hot enough, your oil has too low a smoke point, or your seasoning is thin. Preheat longer, use a high-heat oil, and refresh your seasoning layer if needed.
How to Choose Cast Iron Cookware Step by Step
Let’s make shopping simple. Follow these steps to pick the right pan for your kitchen.
- Choose your finish. Pick bare cast iron if you want a tough everyday skillet for searing, baking, and frying. Pick enameled cast iron if you want a Dutch oven for soups, stews, and acidic tomato sauces.
- Pick the right size. A 10-inch skillet is perfect for one or two people. It holds two chicken breasts or three eggs. A 12-inch skillet suits families of four, but remember, it’s much heavier. For Dutch ovens, 5–7 quarts is a sweet spot for most homes.
- Look for a helper handle. Because cast iron is heavy, a small loop opposite the main handle is key. You can lift safely with two hands when the pan is full of hot food.
- Check the pouring spouts. Good bare cast iron skillets have small spouts on the sides. These make it safer and cleaner to pour off hot bacon grease or oil.
- Buy pre-seasoned if you are a beginner. Most bare cast iron now comes “pre-seasoned.” Wash with warm soapy water, dry well, and start cooking.
- Feel the surface texture. Some skillets are smoother (machined or “polished”) and release eggs a bit easier. Others are slightly rougher (sand-cast) and build seasoning fast. Either works—choose what feels right in your hand.
- Confirm your stove and oven needs. Cooking on induction? Any cast iron works. Using a glass top? Choose a pan with a flatter, smoother base and always lift to move. Planning high-heat baking or broiling? Verify the brand’s max oven-safe temperature, especially for enameled cast iron and lids.
- Test the balance and handle comfort. If possible, hold the skillet with and without a lid. A balanced pan with a comfortable handle is safer and easier to control.
What Home Cooks Often Overlook (But Shouldn’t)
- Lid fit: A well-fitting lid traps steam, speeds up braises, and keeps stovetop mess down. For skillets, a matching lid turns your pan into a shallow Dutch oven.
- Weight tolerance: If you’re unsure, start with a 10-inch skillet. It’s the most user-friendly size to lift, clean, and store.
- Value vs. price: Basic bare cast iron performs like a champ. Save splurges for enameled Dutch ovens, where enamel quality, lid design, and fit matter.
Common Mistakes to Avoid
I’ve seen many home cooks get frustrated. Skip these common traps:
- Buying a massive pan you cannot lift. Bigger is not always better. A 15-inch pan is extremely heavy and tough to clean in a standard sink.
- Overspending on bare cast iron. Bare cast iron is a molded hunk of iron. A simple $25 skillet can cook as well as a $150 bare skillet. Save big bucks for enameled Dutch ovens, where enamel quality makes more difference.
- Thinking cast iron heats perfectly evenly. It doesn’t. It holds heat well. Preheat for about five minutes on medium-low to even things out.
- Buying vintage pans without safety checks. Flea market finds can be great, but check safety. Before buying vintage cookware, it’s smart to check with the Consumer Product Safety Commission (CPSC) or use a safe home lead testing kit. Some old pans were used to melt lead for fishing sinkers.
- Using metal spatulas on enamel. Metal is fine for bare cast iron. On enameled cast iron, use wood or silicone to avoid chips and scratches.
- Soaking bare cast iron or running it through the dishwasher. Long soaks and dishwashers cause rust. Wash, dry, oil—done.
- Heating enameled cast iron empty on high. Enamel prefers gradual heat. Start low, then raise the heat. Sudden high heat can damage the coating.
Practical Tips from Daniel
After years of cooking and testing gear, these tips make cast iron easier to love. Daniel’s Kitchen Tip: Buy a silicone handle cover. Cast iron handles get blistering hot on the stove. Oven mitts work, but a cheap silicone sleeve that lives on the handle makes it safer to grab during cooking. Kitchen Safety Note: Never throw cold water into a screaming hot cast iron pan. The shock can crack the iron. Let the pan cool a bit on the stove before washing.

Daniel’s Cleaning Tip: Don’t be afraid of dish soap. The old myth came from harsh lye soaps decades ago. Today’s dish soaps are gentle. Wash bare cast iron with warm water and a little mild dish soap, dry it thoroughly with a towel, and rub a tiny drop of oil on it. It’ll be fine.
Seasoning, Cleaning, and Rust Prevention (Fast Guide)
- Seasoning refresh: If food starts to stick, wipe the warm pan with a thin film of oil, then heat it on the stove for a few minutes or bake at 400°F for 45–60 minutes. Let cool in the oven.
- Daily clean: While the pan is warm, add a splash of hot water and use a brush or plastic scraper. Dry right away. Wipe with 2–3 drops of oil until it looks satin, not greasy.
- Stubborn bits: Use a paste of coarse salt and a little oil. Scrub, rinse, dry, and re-oil.
- Rust fix: Scrub rust with steel wool or a scrubber until clean metal appears. Wash, dry fully, then re-season.
- Storage: Keep pans dry and uncovered. If you stack, place a paper towel or cloth between pans to protect seasoning and enamel.
Bare vs. Enameled: Which Pan for Which Job?
- Best for searing steaks, smash burgers, and crispy potatoes: Bare cast iron skillet.
- Best for eggs and pancakes: A well-seasoned bare skillet or a smoother-finish bare skillet. Preheat and use enough oil or butter.
- Best for chili, coq au vin, bolognese, and braises: Enameled Dutch oven (no rust, easy cleanup, great lid seal).
- Best for cornbread and deep-dish pizza: Bare cast iron skillet or a cast iron pizza pan.
Key Takeaways
- Bare cast iron is best for searing and baking, while enameled cast iron is best for soups and acidic foods.
- A 10-inch or 12-inch pan is the best starting size for a home kitchen.
- Always look for a skillet with a helper handle so you can lift heavy food safely.
- Bare cast iron needs to be dried completely and lightly oiled after every wash to stop rust.
- Do not overspend on bare cast iron; basic, affordable brands work beautifully.
- Preheat for even results. Use high-heat oils for searing to reduce smoking.
- For glass cooktops, lift—don’t slide—and keep the base clean and smooth.
Frequently Asked Questions
What size cast iron skillet is best for a beginner?
A 10-inch skillet is the best size for a beginner. It’s light enough to handle, fits a standard burner, and can cook two chicken breasts or a small cornbread.
Can I use cast iron on a glass top stove?
Yes, you can use cast iron on a glass top stove, but be careful. Never slide the heavy pan across the glass, as it can scratch. Always check your stove manufacturer’s manual to ensure the glass is rated for the weight.
Should I buy pre-seasoned cast iron?
Yes, buying pre-seasoned cast iron saves time. It comes with a baked-on layer of oil, so you can wash it lightly and start cooking right away.
Can I use metal spatulas on cast iron?
You can use metal spatulas on bare cast iron, and it can even smooth the pan over time. Never use metal tools on enameled cast iron, as they can chip the glass-like coating.
Why is my cast iron pan smoking so much?
The heat is likely too high, or your oil has a low smoke point, like butter or extra virgin olive oil. Turn the burner down and switch to canola, vegetable, avocado, or peanut oil for high-heat searing.
How do I know if my cast iron is ruined?
Bare cast iron is rarely ruined unless it’s cracked or warped. Even heavy rust can be scrubbed off and re-seasoned. If an enameled cast iron pan has chipped enamel on the cooking surface, stop using it so glass doesn’t end up in your food.
Is cast iron safe for induction and high-heat cooking?
Yes. Cast iron works great on induction and can handle high heat. For enamel, confirm the brand’s max temperature—some lids and enamel finishes have limits.
What oil should I use to season cast iron?
Use a neutral, high-smoke-point oil like canola, grapeseed, or vegetable oil. Apply a very thin coat and bake or heat until the surface looks dry and satiny.
My eggs stick. What am I doing wrong?
Preheat longer, add enough fat, and let the eggs release on their own before flipping. If sticking continues, give the pan a quick seasoning refresh.
Can I put my cast iron in the dishwasher?
No for bare cast iron—it will rust. Hand-wash, dry, and oil. For enamel, check the brand’s guidance. Hand-washing preserves the finish best.
Final Thoughts
Learning how to choose cast iron cookware comes down to how you cook. If you want a rugged, low-cost pan for amazing burgers and steaks, get a standard bare 10-inch or 12-inch skillet. If you want a beautiful pot for slow-cooking chili and soups without worrying about rust, save up for an enameled Dutch oven.
Don’t let care rules scare you. Wash it, dry it fully, rub a tiny bit of oil on it, and put it away. It really is that simple. With time, that pan will become one of the most reliable tools you own—and a piece you’ll pass down.
Once you get your new pan home, you’ll need a good place to keep it safe and dry. If you need easy ideas for storing heavy cookware, check out our guide to practical kitchen organization and pantry setup. Happy cooking!