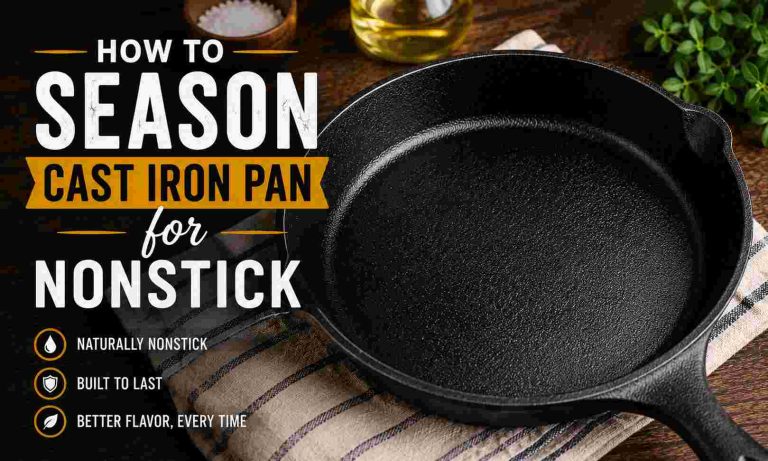
How to Season a Cast Iron Skillet for the First Time Easy Guide

Seasoning your cast iron skillet for the first time is a crucial step for its longevity and performance. This guide provides an easy, step-by-step process to create a durable, naturally non-stick surface. You’ll learn the best oils, proper application, oven baking techniques, and essential tips to ensure your cast iron is ready for a lifetime of delicious cooking, protecting it from rust and enhancing its non-stick properties.
How to Season a Cast Iron Skillet for the First Time Easy Guide
Welcome to the wonderful world of cast iron cooking! If you’ve just brought home a brand new cast iron skillet, you’re in for a treat. These durable, versatile pans can last for generations, but they require a little TLC to get started. The most important first step? Seasoning it. Don’t worry, it sounds more complicated than it is! This easy guide will walk you through exactly how to season a cast iron skillet for the first time, ensuring it’s ready to become your favorite kitchen tool.
By the end of this guide, you’ll know:
- What seasoning truly is and why it’s so important.
- Which oils work best for the job.
- A simple, step-by-step process to season your skillet in the oven.
- Practical tips for a perfect first seasoning.
- How to maintain your skillet so it stays non-stick and rust-free for years to come.
Let’s get that new cast iron skillet ready for some amazing meals!
What Exactly is Seasoning Your Cast Iron Skillet?
When we talk about “seasoning” a cast iron skillet, we’re not talking about adding salt and pepper. Instead, it’s a process of baking thin layers of oil onto the surface of the pan at a high temperature. This causes the oil to polymerize, transforming it from a liquid into a hard, protective, and non-stick layer that bonds to the metal. Think of it like a natural, super-durable coating.
This seasoned layer serves a few key purposes:
- Non-Stick Surface: It creates a naturally slick cooking surface that improves with every use, allowing food to release easily.
- Rust Protection: Cast iron is prone to rust if exposed to moisture. The seasoned layer acts as a barrier, protecting the metal.
- Flavor Enhancement: Over time, the seasoning absorbs flavors, contributing to the unique taste of food cooked in cast iron.
Why Season a Brand New Cast Iron Skillet (Even if it’s “Pre-Seasoned”)?
Most new cast iron skillets come “pre-seasoned” from the factory. This initial layer is a good start, providing some basic protection and a foundational non-stick surface. However, it’s often a very thin layer, primarily to prevent rust during shipping and storage.
Doing your own initial seasoning, or adding a few extra seasoning layers, is highly recommended for a brand new skillet for several reasons:
- Reinforces the Factory Seasoning: It builds upon the existing layer, making it stronger and more durable.
- Personalizes Your Pan: You control the type of oil used and the quality of the layers, customizing it to your cooking needs.
- Ensures Even Coverage: Sometimes factory seasoning can be uneven. Your own seasoning process ensures every nook and cranny is coated.
- Better Performance from Day One: A properly seasoned skillet will perform much better, right out of the box, offering a more reliable non-stick experience.
Choosing the Right Oil for Seasoning Your Cast Iron Skillet
The type of oil you choose for seasoning makes a difference. You want an oil with a high smoke point (the temperature at which an oil starts to burn and smoke) and one that will polymerize effectively. Here are some excellent choices:
- Grapeseed Oil: A favorite among many cast iron enthusiasts. It has a very high smoke point, is neutral in flavor, and polymerizes well.
- Flaxseed Oil: Known for creating a very hard, durable seasoning. However, it can be a bit more expensive and some find it can flake if not applied extremely thinly.
- Vegetable Oil (Soybean, Canola): Easily accessible and affordable, these are good general-purpose options with decent smoke points.
- Crisco (Vegetable Shortening): A traditional choice that works very well. It’s solid at room temperature, making it easy to apply a thin layer.
- Avocado Oil: Another excellent high smoke point option, though often pricier than others.
Oils to generally avoid for initial seasoning: Olive oil (especially extra virgin), butter, and coconut oil, as they have lower smoke points and can become sticky or gum up at the high temperatures needed for seasoning.
Materials You’ll Need
Gathering your supplies beforehand will make the process much smoother:
- Your new cast iron skillet
- Mild dish soap (optional, for initial cleaning only)
- Warm water
- Stiff brush or sponge (avoid metal scouring pads)
- Clean, lint-free cloths or paper towels
- Your chosen high smoke point oil (e.g., grapeseed, vegetable, Crisco)
- Aluminum foil or a baking sheet
- Oven mitts
Step-by-Step Guide: How to Season a Cast Iron Skillet for the First Time
Follow these steps carefully to achieve a beautiful, functional seasoning on your new skillet.
Step 1: Clean Your Brand New Skillet Thoroughly
Even if your skillet is “pre-seasoned,” it’s vital to give it a good wash first. This removes any factory residues, waxes, or debris that might be present. Don’t worry, a single wash with mild soap won’t strip away the factory seasoning if you dry it quickly!
Wash with Warm Water and Mild Soap:
Use warm water and a small amount of mild dish soap. Use a stiff brush or sponge to scrub the entire skillet, inside and out, including the handle and bottom.
Rinse Completely:
Make sure to rinse off all soap residue.
Dry IMMEDIATELY and COMPLETELY:
This is critical! Water is cast iron’s enemy. Place the skillet on a stovetop burner over medium heat for a few minutes until all visible moisture has evaporated and the pan is completely dry. You’ll see steam rising. You can also use a clean cloth or paper towel to wipe it down immediately after rinsing.
Step 2: Apply a Thin, Even Layer of Oil
The key here is “thin.” Too much oil will result in a sticky, gummy seasoning rather than a hard, slick one.
Choose Your Oil:
Select one of the high smoke point oils mentioned earlier.
Apply a Small Amount:
Pour about 1-2 teaspoons of your chosen oil onto a clean, lint-free cloth or paper towel.
Rub it In:
Vigorously rub the oil all over the entire skillet – the inside, outside, handle, and even the bottom. Every single surface should have a thin layer of oil.
Wipe Off the Excess:
Now, and this is perhaps the most important part, use a fresh, dry cloth or paper towel to wipe off as much oil as you possibly can. The skillet should look dry, almost as if you hadn’t oiled it at all. If you think you’ve wiped enough, wipe it one more time. You’re aiming for a microscopic layer of oil, not a visible one.
Step 3: Bake the Skillet Upside Down
Baking at a high temperature allows the oil to polymerize, forming that crucial non-stick layer.
Preheat Your Oven:
Set your oven to a high temperature, typically between 450°F and 500°F (230°C to 260°C). Make sure to give it enough time to fully preheat.
Prepare for Drips:
Place a sheet of aluminum foil or an old baking sheet on the bottom rack of your oven. This will catch any oil drips, preventing them from burning onto your oven floor.
Place Skillet Upside Down:
Once the oven is preheated, carefully place your oiled skillet upside down on the middle rack. This position allows any remaining excess oil to drip off, preventing puddling and stickiness.
Bake for One Hour:
Let the skillet bake for at least one hour. During this time, the oil will polymerize and bond to the iron. You might notice some light smoke, which is normal as the oil burns off. Ensure your kitchen is well-ventilated.
Step 4: Let It Cool Down Slowly
Allowing the skillet to cool gradually is important for the seasoning to set properly and to prevent thermal shock, which could warp the pan.
Turn Off the Oven:
After one hour, turn off the oven.
Leave Skillet Inside:
Leave the skillet inside the oven as it cools down completely to room temperature. This can take an hour or more. Resist the urge to open the oven door and peek or remove the pan early.
Step 5: Repeat the Process (Multiple Coats are Key!)
A single layer of seasoning isn’t enough to provide a truly durable, non-stick surface. Think of it like painting a wall; multiple thin coats are always better than one thick one.
Repeat Steps 2-4:
Once the skillet is cool, repeat the entire oiling, wiping, baking, and cooling process (Steps 2 through 4).
Aim for 3-5 Cycles:
For a brand new cast iron skillet, aim for at least 3 to 5 full seasoning cycles. Each cycle adds another thin layer, building up a robust and resilient seasoning that will serve you well for years.
Observe the Change:
After a few cycles, you’ll notice your skillet taking on a darker, smoother, and slightly glossy appearance. This is a good sign that your seasoning is building up!
Tips for a Perfect First Seasoning
Here are some additional tips to ensure your first seasoning process is a success:
- Thin is In: We can’t stress this enough. The biggest mistake beginners make is applying too much oil, leading to a sticky surface. Wipe, wipe, and wipe again!
- High Smoke Point Oils: Stick to oils like grapeseed, flaxseed, vegetable, or Crisco. These oils can withstand the high temperatures needed for proper polymerization. If you’re wondering, can you season cast iron with canola oil, the answer is yes, it’s a great option due to its high smoke point and affordability.
- Don’t Rush the Cooling: Patience is a virtue, especially with cast iron. Let it cool slowly in the oven.
- Ventilate Your Kitchen: There will be some smoke and odor during the baking process as the oil polymers. Open windows and turn on your exhaust fan.
- Consider an Initial Cook: After your final seasoning layer, try cooking something with a bit of fat, like bacon or frying potatoes with some oil. This can further embed the seasoning and kickstart your skillet’s non-stick properties. When you use a cast iron skillet for the first time, cooking fatty foods can really help the seasoning set.
Common Mistakes to Avoid
- Using Too Much Oil: As mentioned, this is the number one culprit for a sticky, patchy seasoning.
- Not Drying Completely: Any residual water will lead to rust, especially during the high heat of the oven.
- Using Low Smoke Point Oils: Oils like extra virgin olive oil or butter will simply burn and create an unpleasant mess rather than a durable seasoning.
- Skipping Multiple Layers: One layer won’t give you the robust, long-lasting non-stick surface you desire. Be patient and repeat the process.
- Using Harsh Soaps After Initial Seasoning: Once your skillet is seasoned, avoid strong detergents or abrasive scrubbers, as these can strip away your hard-earned seasoning.
Troubleshooting Common Seasoning Issues
Even with the best intentions, you might encounter a minor issue. Don’t despair!
Sticky Skillet After Seasoning:
If your skillet feels sticky or gummy after cooling, it means too much oil was applied, or the oven temperature wasn’t high enough to fully polymerize it. The fix? You might need to gently scrub off the sticky layer with a stiff brush and warm water (no soap necessary at this point) and then re-season, making sure to wipe off all excess oil.
Flaking Seasoning:
If your seasoning starts to flake, it could be due to uneven oil application, too thick a layer, or old/damaged seasoning. The best approach here is often to deep clean your cast iron skillet to remove the compromised seasoning and then start fresh with several thin layers.
Rust Spots Appearing:
Rust usually indicates that the skillet wasn’t dried completely before storage or that the seasoning layer isn’t thick enough in certain spots. To fix this, you’ll need to address the rust. Our guide on how to clean a rusty cast iron skillet can help you safely remove the rust. Once removed, ensure the skillet is thoroughly dried, and then re-season that area, or the entire pan, with a few extra coats.
Maintaining Your Newly Seasoned Skillet
The initial seasoning is a fantastic start, but maintaining it is an ongoing process that happens with every use. A well-cared-for cast iron skillet will improve with age.
- Clean Gently: After cooking, clean your skillet with warm water and a stiff brush or a cast iron scraper. Avoid harsh soaps if possible, though a tiny bit of mild soap is okay if you rinse and dry quickly.
- Dry Thoroughly: Always dry your skillet immediately after washing. You can place it on a low burner for a few minutes to ensure all moisture has evaporated.
- Apply a Light Coat of Oil: After drying, apply a very thin layer of cooking oil (the same type you used for seasoning works well) to the inside of the pan before storing. This helps protect the surface and builds up the seasoning over time. This is a crucial step in how to care for your cast iron skillet in the long run.
- Regular Use: The best way to maintain and improve your seasoning is to use your cast iron skillet regularly! Cooking with it, especially fatty foods, helps to reinforce and deepen the non-stick layer. Learning how to properly use a cast iron skillet will ensure its seasoning lasts a lifetime.
Conclusion
Congratulations! You now have all the knowledge and steps to successfully season a cast iron skillet for the first time. While it requires a bit of time and patience, the reward is a durable, naturally non-stick, and incredibly versatile cooking tool that will serve you for many years, possibly even for generations. Remember, the journey of cast iron seasoning doesn’t end with the first few coats; it evolves and improves with every meal you cook and every time you lovingly re-oil it. Enjoy cooking with your perfectly seasoned cast iron skillet!