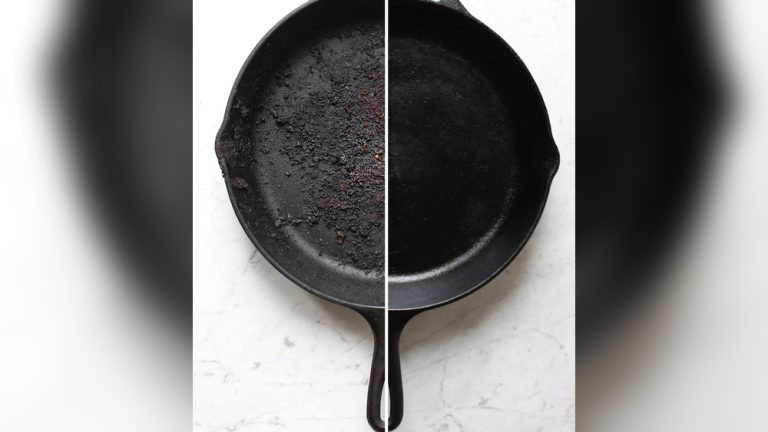
How to Deep Clean Cast Iron Skillet for Lasting Performance

Every kitchen has a few tools that feel almost magical. The cast iron skillet is one of them. I still remember the first time I seared a steak in mine and heard that perfect sizzle. With its heavy weight and classic look, a cast iron can build a beautiful crust on steak, bake golden cornbread, or fry eggs with crisp edges. But cast iron needs care—especially when you want a deep clean. If you’ve ever worried about how to deep clean a cast iron skillet without ruining it, you’re in the right place. I’ve cleaned dozens of pans—mine and others—and I’ll walk you through safe, practical steps so you don’t strip seasoning or invite rust.
This guide walks you through every detail: when to deep clean, step-by-step methods, how to remove rust, and how to re-season. I also share tools I use, product picks, common mistakes I see, and quick fixes. Read on and you’ll feel confident keeping your cast iron clean, nonstick, and ready for decades of cooking.
What Makes Cast Iron Skillets Special?
Cast iron is not like modern nonstick or stainless steel. It’s a single piece of iron that heats slowly but holds heat very well. That makes it great for searing, frying, braising, and baking. The surface is rough at a microscopic level. That roughness needs a protective layer called seasoning. Seasoning is just baked-on oil. It keeps food from sticking, protects the iron from moisture, and builds the pan’s nonstick surface over time.
You can’t treat a cast iron skillet like other pans. Don’t put it in the dishwasher. Harsh detergents and long soaking can strip seasoning and cause rust. Deep cleaning means removing stuck-on food, old sticky oil, and light rust. The aim is to fix problems while preserving or rebuilding seasoning.
Signs Your Cast Iron Needs Deep Cleaning
You don’t need to deep clean after every use. Too much scrubbing can wear the seasoning thin. But a deep clean is needed sometimes. Look for these signs:
- Sticky surface: The pan feels tacky or gummy after cooking. That is old oil buildup.
- Visible rust: Small orange spots or streaks on the surface.
- Burnt-on food: Bits that won’t come off with a gentle scrub.
- Off smells: Sour or rancid odors from old fat or oil.
- Flaking or black residue: Tiny black flakes rub off on a paper towel. That means the seasoning is breaking down.
If you ignore these signs, cooking gets harder and flavors can suffer. Deep cleaning solves these issues and extends the skillet’s life. Keywords to remember here: deep clean cast iron skillet, remove rust from cast iron, restore cast iron seasoning.
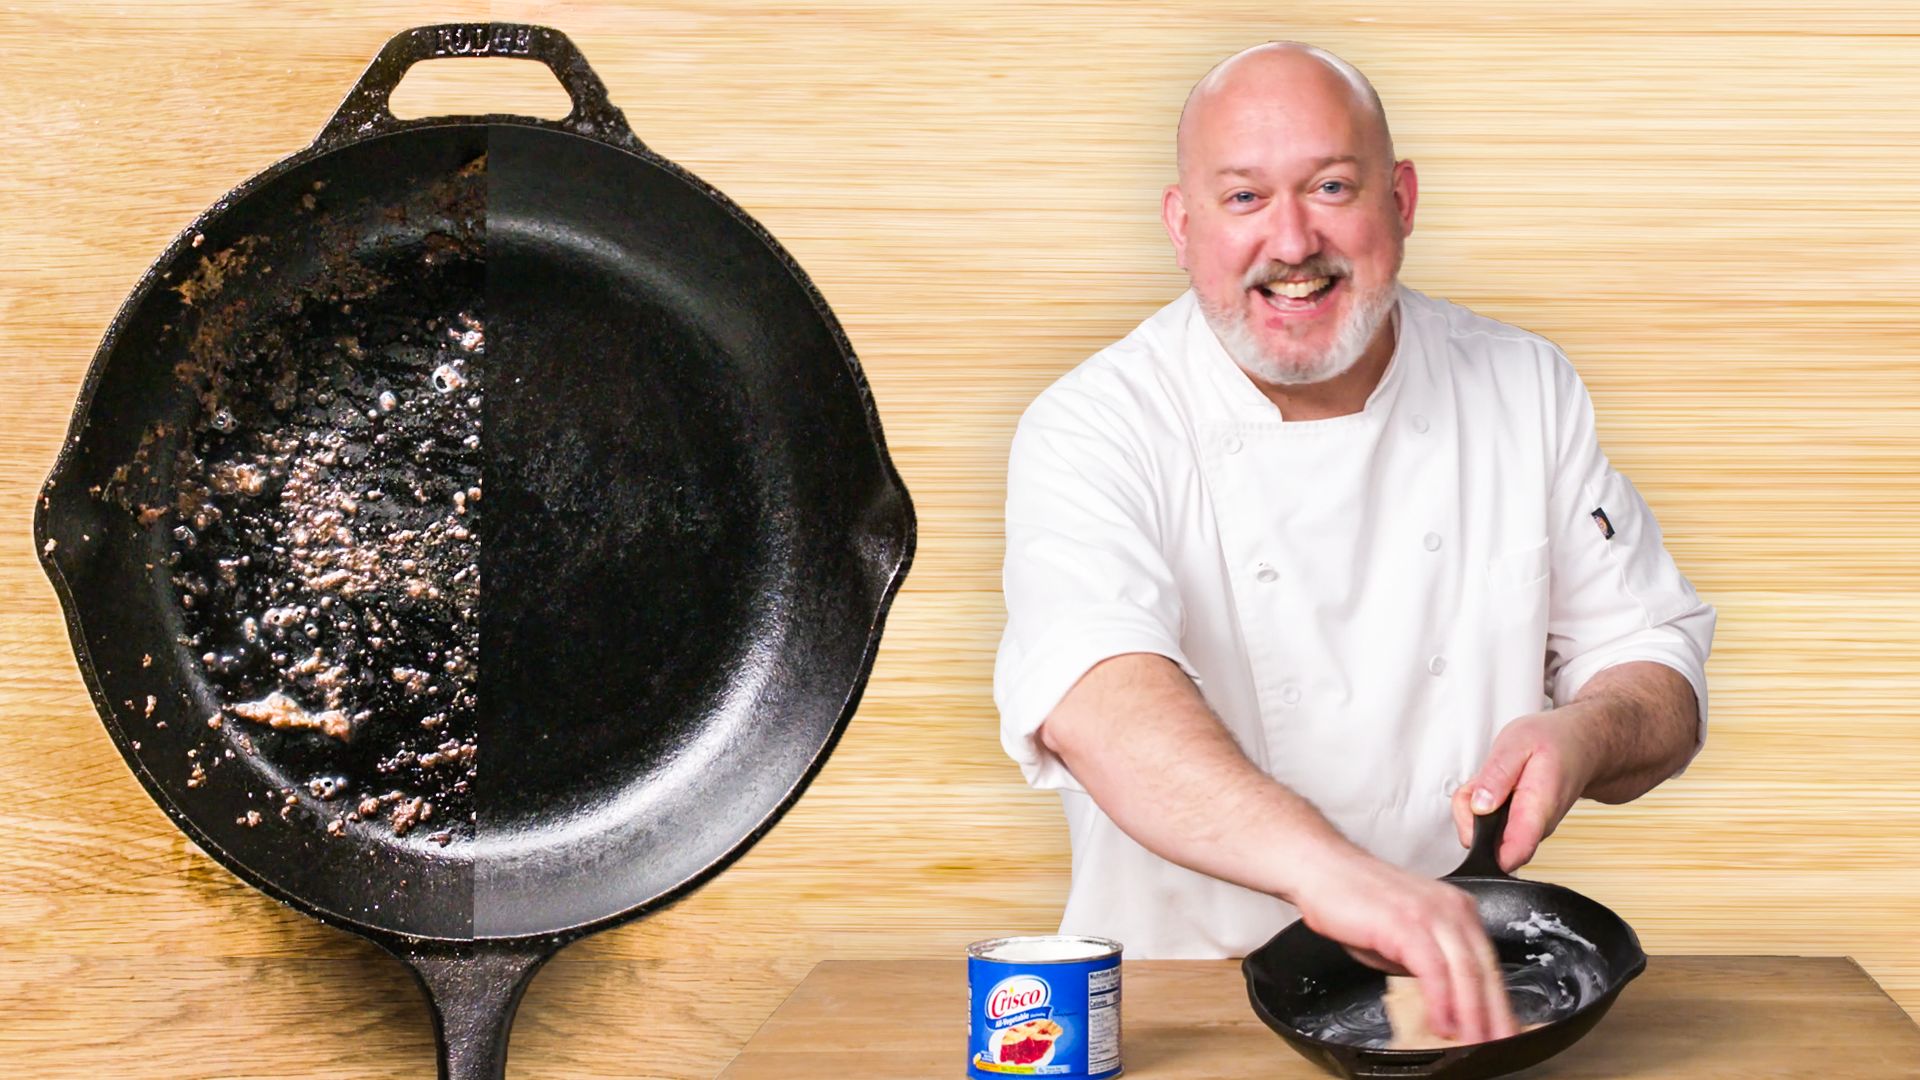
Credit: www.epicurious.com
Essential Tools And Products For Deep Cleaning
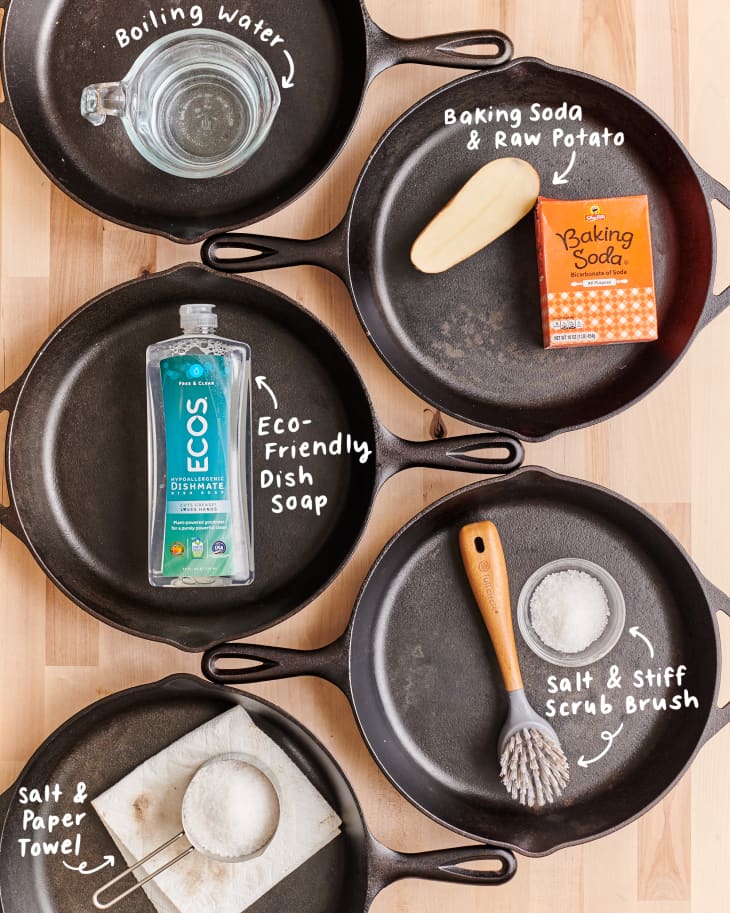
Deep cleaning a cast iron skillet doesn’t need fancy gear. Use the right simple tools. These are the ones I rely on:
| Tool/Product | Purpose | Recommended Example |
|---|---|---|
| Stiff brush or scrubber | Scrubs away food without harming seasoning | Lodge Scrub Brush |
| Chainmail scrubber | Removes stubborn bits safely | Amagabeli Cast Iron Cleaner |
| Coarse kosher salt | Natural abrasive for scrubbing | Morton Coarse Kosher Salt |
| Plastic scraper | Scrapes off stuck food gently | Lodge Pan Scraper |
| Paper towels or lint-free cloth | Drying and oiling | Bounty Paper Towels |
| Vegetable oil or flaxseed oil | Re-seasoning after cleaning | Crisco Vegetable Oil |
| Oven or stovetop | For drying and seasoning | N/A |
| Mild dish soap (optional) | Breaks down stubborn oils (rarely needed) | Dawn Ultra Dish Soap |
For new cooks, the Lodge Pre-Seasoned Cast Iron Skillet is a solid start. It arrives pre-seasoned and is easy to maintain with these tools. This set of tools covers most cleaning tasks: daily washing, deep clean, rust removal, and re-seasoning.
Step-by-step: How To Deep Clean A Cast Iron Skillet
Here’s the process I use every time I need a true deep clean. Follow these steps in order. They are simple and safe for seasoning when done correctly.
1. Let The Skillet Cool Slightly
Never pour cold water on a hot cast iron pan. Quick temperature shocks can warp or crack the metal. Let the skillet cool until it’s warm to the touch. Warm pans are easier to work with and stuck food loosens more easily.
2. Scrape Off Loose Food Debris
Use a plastic scraper or wooden spatula to push off loose bits. I keep a Lodge Pan Scraper by the sink. Avoid metal tools that can gouge the seasoning. Work patiently—press and scrape rather than picking at the surface hard.
3. Add Coarse Salt For Scrubbing
Pour a handful of coarse kosher salt into the pan. Salt acts as a dry abrasive that won’t harm seasoning. Rub it with a paper towel or cloth in circular motions. You’ll see it pick up grease and burnt bits and turn brown. That’s a good sign.
If you prefer, swap the salt for a chainmail scrubber. Wet the scrubber, and scrub in small circles. The chainmail lifts grime without stripping the seasoning like steel wool can.
4. Use A Stiff Brush Or Scrubber
Rinse the salt away with warm water. Use a stiff brush or non-scratch pad to finish scrubbing. If a spot is stubborn, a little mild dish soap helps. Contrary to old myths, a small amount of soap won’t ruin a well-seasoned pan if you re-season afterward.
Pro tip: For badly stuck-on food, boil a small amount of water in the pan for 5–10 minutes. The steam loosens residue and makes scrubbing easier.
5. Rinse And Dry Immediately
Rinse thoroughly. Hot water is best because it evaporates quickly. Dry the skillet right away with paper towels or a clean cloth. Any lingering moisture invites rust.
I finish drying by heating the skillet on the stove for 5–10 minutes or placing it in a warm oven. This guarantees every drop of water is gone.
6. Check For Rust Or Stubborn Stains
Inspect the surface closely. Small rust spots are normal and fixable. Rub salt with a few drops of oil on the spot, scrub, rinse, and dry. For larger rust patches, use fine steel wool or a chainmail scrubber. Be firm but controlled—don’t over-scrub and remove good seasoning.
7. Re-season The Surface
Deep cleaning often removes some seasoning. Re-seasoning restores protection and nonstick power. Here’s my simple re-season routine:
- Pour about 1 teaspoon of vegetable or flaxseed oil into the pan.
- Use a paper towel to spread the oil evenly inside and out, including the handle.
- Wipe off excess oil. You want a thin, almost invisible layer. Too much oil leaves a sticky surface.
- Place the skillet upside down in an oven preheated to 400°F (200°C). Put foil on the rack below to catch drips.
- Bake for 1 hour, then turn off the oven and let the pan cool inside.
Insight: I see many beginners add too much oil. Less is better. Thin layers baked on give a hard, durable finish.
8. Store Properly
Store cast iron in a dry place. Never stack a damp skillet with others. I place a folded paper towel inside my stored skillets. It absorbs any stray moisture. In humid climates, leave the oven door slightly open for a minute after use to release steam before storing.
Comparison: Deep Cleaning Vs. Daily Cleaning
Deep cleaning is not the same as your normal after-use routine. Here’s a quick comparison so you know which to choose:
| Aspect | Daily Cleaning | Deep Cleaning |
|---|---|---|
| Frequency | After each use | As needed (monthly or less) |
| Tools | Soft brush, hot water | Salt, chainmail, soap (sometimes) |
| Seasoning impact | Preserves seasoning | May remove some seasoning, requires re-seasoning |
| Purpose | Remove food and oils | Fix rust, sticky residue, odors, or burnt food |
| Drying | Quick towel dry | Oven or stovetop dry |
Important: Make deep cleaning a special task. Regular gentle care keeps the seasoning strong. Deep clean only when the pan shows real issues.
Common Mistakes To Avoid
Here are common errors I’ve seen that shorten a skillet’s life. Avoid them:
- Soaking in water: Long soaks lead to rust fast.
- Using metal scouring pads: Heavy steel wool will remove seasoning. Use it only when removing rust from neglected pans.
- Skipping drying: Any left-over moisture invites rust within minutes.
- Too much oil during seasoning: That creates a sticky film, not a hard finish.
- Not re-seasoning after deep cleaning: Skipping re-seasoning leaves iron exposed.
- Using harsh detergents: Strong chemicals strip the nonstick layer.
- Storing in a damp place: Humidity causes rust even on well-seasoned pans.
Non-obvious insight: Rust does not mean your skillet is ruined. Light rust is almost always fixable with scrubbing and re-seasoning. I’ve rescued many garage-sale finds this way.
Credit: www.thekitchn.com
Troubleshooting: How To Fix Specific Cast Iron Problems
Even with good care, issues can come up. Here are quick fixes I use for the most common problems:
Problem: Sticky Or Gummy Surface
Cause: Too much oil or oil not cured at high enough heat.
Solution: Wash with hot water and mild soap. Scrub with salt or chainmail. Rinse and dry. Re-season using a very thin layer of oil and bake at 400°F for an hour. Wipe off extra oil before baking.
Problem: Rust Spots Or Patches
Cause: Water left on the pan, humid storage, or covered wet pans.
Solution: Scrub rust with salt and oil or fine steel wool. Wash, dry fully, then re-season. Severe rust may need repeated scrubbing and re-seasoning.
Problem: Flaking Black Bits
Cause: Old seasoning is breaking off—often from overheating or poor initial seasoning.
Solution: Scrub away loose flakes. Deep clean and apply two or three thin seasoning layers. Cook fatty foods to help the seasoning build up faster.
Problem: Strong Or Off Odors
Cause: Rancid oil trapped in old seasoning.
Solution: Deep clean with salt and a little soap. Rinse, dry, and re-season. Baking the empty skillet at 400°F for 30 minutes helps burn off lingering smells.
Problem: Uneven Or Patchy Surface
Cause: Uneven seasoning, using harsh tools, or sloppy oiling.
Solution: Apply thin, even coats of oil and bake at high heat. Use the skillet often. Cooking with fats—like frying bacon—helps even out seasoning faster.
Advanced Tips For Long-lasting Cast Iron
- Use your skillet often. Regular use with oil or fat builds and strengthens seasoning.
- Don’t fear high heat. Cast iron is built for searing and oven use. High heat won’t hurt a well-seasoned pan.
- Avoid acidic foods right after deep cleaning. Tomatoes and vinegar can strip a new seasoning layer. Wait until the seasoning matures.
- Try flaxseed oil for seasoning. It can create a very hard, durable finish if used carefully.
- Label your skillet. If you own several, a bit of tape noting the last seasoning date helps you track maintenance.
Non-obvious insight: The more you use cast iron, the easier it gets to keep. A frequently used skillet matures into an almost indestructible, forgiving tool.
How To Choose The Right Products For Cleaning And Care
There are many products out there. Here’s what really matters when you buy for cast iron care:
- Brushes and scrubbers: Stiff bristles that won’t scratch. Avoid heavy steel wool unless removing rust.
- Salt: Coarse kosher salt is ideal. It’s abrasive but gentle on seasoning.
- Oils: Vegetable, canola, and flaxseed work. Flax creates a harder finish but costs more.
- Chainmail scrubbers: Reusable and effective. They clean well without chemicals.
When shopping online, the Lodge Pan Scraper and Amagabeli Chainmail Scrubber are highly rated. I link to a few reliable picks below, so you can pick what fits your budget and style.
Real-life Example: Deep Cleaning In Action
Imagine you just fried a big batch of chicken. Batter stuck to the skillet and there’s a faint burned-oil smell. Here’s my step-by-step fix:
- Let the skillet cool until warm.
- Scrape off loose food with a plastic scraper.
- Pour in a quarter cup of coarse salt and scrub with a paper towel, focusing on stuck spots.
- Rinse under warm water and use a stiff brush on stubborn areas.
- Dry immediately with paper towels, then heat on the stove for 5 minutes to evaporate moisture.
- If rust or stickiness appears, repeat the salt scrub or use chainmail.
- When dry, rub a teaspoon of oil inside and out, wipe off excess, and bake at 400°F for an hour.
- Cool in the oven and store with a paper towel inside to absorb humidity.
Result: The skillet is clean, neutral-smelling, and back to a strong nonstick surface. This simple routine solves most deep-clean problems.

Credit: www.youtube.com
How To Restore A Neglected Or Rusty Skillet
Found a rusty pan at a flea market? Left one in the sink too long? You can bring it back. Here’s how I restore neglected cast iron:
- Scrub all rust away with fine steel wool. Be thorough but avoid deep gouges.
- Wash the pan with warm water and mild soap. This is one of the few times soap helps remove grime.
- Dry completely. The oven on low heat works well.
- Apply a thin layer of oil inside and out.
- Bake upside down at 400°F (200°C) for 1 hour. Repeat oiling and baking two or three times for a robust finish.
This full clean-and-restore is called re-seasoning. It takes time, but I’ve turned many rough pans into favored cookers with this method.
The Science Behind Seasoning
Seasoning is simple chemistry. When oil heats on iron at high temperature, it goes through polymerization. Oil molecules bond to each other and to the metal surface. The result is a thin, hard, plastic-like layer. That layer is what gives your skillet nonstick properties and rust resistance.
Key point: Thin, well-cured layers of oil are better than thick, gloopy coats. Build seasoning in thin passes, not with heavy pours.
Quick Reference: Do’s And Don’ts Of Cast Iron Deep Cleaning
Here’s a simple cheat sheet you can keep in your head:
Do’s:
- Do use coarse salt or chainmail for scrubbing.
- Do dry your skillet immediately and completely.
- Do re-season after deep cleaning.
- Do use a little mild soap if needed, then rinse well.
Don’ts:
- Don’t soak the pan in water.
- Don’t use metal utensils for scraping unless you’re fully resurfacing.
- Don’t store when damp or tightly covered.
- Don’t forget to wipe off extra oil after seasoning.
Best Amazon Products For Cast Iron Care
Here are a few highly-rated Amazon products that make deep cleaning and maintenance easy:
| Product Name | Purpose | Amazon Link |
|---|---|---|
| Lodge Pan Scraper | Safe food removal | See on Amazon |
| Amagabeli Chainmail Scrubber | Deep cleaning without chemicals | See on Amazon |
| Lodge Scrub Brush | Gentle scrubbing | See on Amazon |
| Morton Coarse Kosher Salt | Natural abrasive for cleaning | See on Amazon |
| Lodge Pre-Seasoned Skillet | High-quality cast iron | See on Amazon |
FAQs For How to Deep Clean Cast Iron Skillet
How Often Should I Deep Clean My Cast Iron Skillet?
Deep cleaning is not needed after every use. Most cooks only deep clean when there’s burnt food, sticky buildup, or rust. For many people that means once every few months. The main goal is to deep clean when you see problems, not on a set schedule.
Can I Use Regular Dish Soap On Cast Iron?
Yes, mild dish soap is fine in small amounts. It helps remove stubborn oils and smells. A short wash with soap won’t ruin a skilled’s seasoning if you re-season afterward. Avoid strong detergents and never soak the pan.
What’s The Best Oil For Re-seasoning After Deep Cleaning?
Vegetable oil and canola oil are good and inexpensive. Flaxseed oil costs more but can give a harder, smoother finish. Whatever oil you pick, use a very thin layer and bake it long enough to cure.
Is It Safe To Cook Acidic Foods After Deep Cleaning?
I recommend waiting until your seasoning is mature before cooking acidic foods like tomatoes, vinegar, or wine-based sauces. Acid can strip new seasoning. After a few uses with fatty foods, the seasoning will be strong enough for acidic dishes.
What Should I Do If My Skillet Rusts Again After Cleaning?
Don’t panic. Small rust spots are common, especially in humid areas. Scrub them off with salt or chainmail, dry fully, and re-season. Regular oiling and proper drying go a long way to prevent repeat rust.
If you want more background on cast iron, the Cast Iron Cookware Wikipedia page has useful history and technical details.
A well-cared-for cast iron skillet can last for generations. Follow these steps, use the right tools, and re-season when needed. With a little practice, deep cleaning becomes quick. Your skillet will reward you with great meals for years.