How To Cure Cast Iron Cookware: Easy Seasoning Guide 2026

Curing cast iron cookware builds a hard, nonstick layer that protects it and improves cooking.
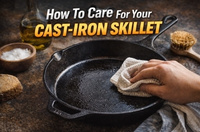
If you have ever wondered how to cure cast iron cookware the right way, you are not alone. I’ve worked with plenty of new and old pans, and the same lesson always shows up: good seasoning is less about magic and more about clean metal, thin oil, and steady heat. In this guide, I’ll walk you through how to cure cast iron cookware with simple steps, real-world tips, and a few mistakes I learned the hard way.
:max_bytes(150000):strip_icc()/How-to-Season-Cast-Iron-Skillet-3x2-1-bcd280f1703e47e0a59bb62e86a0d53a.png)
What It Means to Cure Cast Iron Cookware
To cure cast iron cookware means to build and bond a thin layer of oil onto the pan’s surface through heat. That layer is often called seasoning, and it helps create a smoother cooking surface while protecting the metal from rust.
People often use the words cure and season as if they mean the same thing, and in most home cooking settings, they do. The goal is the same either way: keep moisture out, make cooking easier, and help the pan last for years.
Cast iron is strong, but it is also reactive. If bare iron meets water for too long, rust can form fast. A proper cure gives the pan a shield, a little like giving it a raincoat before a storm.
Why Curing Cast Iron Matters
Curing cast iron cookware is not just about looks. It changes how the pan performs every day in the kitchen.
A well-cured pan offers several benefits:
• Better nonstick performance, especially for eggs, pancakes, and fish
• Rust protection that keeps the pan usable for the long haul
• More even cooking over time as the surface becomes smoother
• Easier cleanup because food is less likely to stick hard
• Better flavor development for seared meats and skillet dishes
I’ve seen brand-new cast iron pans turn frustrating fast when people skip this step. Food sticks, rust spots appear, and the pan gets shoved to the back of the cabinet. Once the cure is done well, though, cast iron becomes one of the most forgiving tools in the kitchen.
What You Need Before You Cure Cast Iron Cookware
You do not need a complicated setup. In fact, one of the best parts of learning how to cure cast iron cookware is how little equipment it takes.
Here’s what helps:
• Mild dish soap and warm water for cleaning
• A scrubber or nonmetal brush
• A dry towel or paper towels
• A high-smoke-point oil, such as flaxseed oil, canola oil, grapeseed oil, or vegetable oil
• An oven or stovetop
• Optional: aluminum foil or a baking sheet to catch drips
The oil matters more than many people think. You want a thin layer that can polymerize, which means it bonds to the metal when heated. Too much oil leaves the surface sticky instead of smooth.
How to Cure Cast Iron Cookware Step by Step
Here is the practical method I trust most when curing cast iron cookware at home.
1. Clean the Pan Well
Wash the pan with warm water and a small amount of dish soap if needed. Modern dish soap is fine for a truly clean start, especially on a new or old pan that has dust, grease, or old food residue.
Scrub away rust, flakes, or stuck bits. If the pan has old, damaged seasoning, remove as much loose material as possible. A good cure starts with a clean base.
2. Dry It Completely
Dry the pan right away with a towel. Then heat it on the stovetop or in a warm oven for a few minutes to remove any hidden moisture.
This step matters because even a little trapped water can lead to rust. I once rushed this part and ended up with orange freckles on the bottom of a pan by the next day. That taught me a simple rule: dry cast iron like it matters, because it does.
3. Apply a Very Thin Coat of Oil
Put a small amount of oil on a lint-free cloth or paper towel. Rub it over the entire pan, inside and out, including the handle and outer walls.
Then wipe it again with a fresh towel until the surface looks almost dry. This is one of the biggest secrets to curing cast iron cookware well. A thick coat of oil is not better; it usually turns tacky and uneven.
4. Heat the Pan
Place the pan upside down in an oven preheated to about 450°F to 500°F. Put a baking sheet or foil on the rack below it to catch any drips.
Bake it for about one hour, then turn off the oven and let the pan cool inside. This slow cooling helps the oil bond more evenly. The heat transforms the oil into a durable layer that becomes the start of a strong seasoning.
5. Repeat for Stronger Seasoning
One round is good, but two or three rounds are often better, especially for a new pan. Each layer adds to the protective coating and improves the finish.
If the pan still looks patchy after the first round, that is normal. Good seasoning builds like paint on a wall. Thin coats are better than one heavy coat.
Best Oils for Curing Cast Iron Cookware
Not all oils behave the same way. The best oil is one that can handle high heat and polymerize well.
Common choices include:
• Flaxseed oil, which can create a hard finish but may be more prone to flaking if applied too thickly
• Canola oil, which is affordable and widely used
• Grapeseed oil, which performs well for many home cooks
• Vegetable oil, which is easy to find and works reliably
• Avocado oil, which has a high smoke point but can be more expensive
In my experience, the best oil is the one you can apply thinly and consistently. Fancy oil does not rescue sloppy technique. A well-wiped layer of a basic oil often beats a thick coat of a premium one.
Oven Curing vs Stovetop Curing
There are two common ways to cure cast iron cookware: oven curing and stovetop curing. Both work, but they suit different needs.
Oven curing is usually the most even. It coats the entire pan at once and is ideal for a full restoration or first seasoning. Stovetop curing is useful for quick touch-ups or when you want to reinforce a small area.
Here’s a simple comparison:
• Oven curing gives more even heat and better full-pan coverage
• Stovetop curing is faster and good for maintenance
• Oven curing is better for beginners because it is easier to control
• Stovetop curing can work well, but it needs more attention to avoid hot spots
If you are learning how to cure cast iron cookware for the first time, I suggest starting with the oven method. It is more forgiving and gives you a stronger base.
How to Cure Cast Iron Cookware After Rust
If your pan has rust, do not panic. Rust does not always mean the pan is ruined.
Start by removing the rust with steel wool, a scrub pad, or a rust-safe cleaning method. Wash, dry, and then cure the pan as usual. If the rust is light, one or two seasoning rounds may be enough.
If the rust is deep or the pan was stored wet for a long time, you may need more prep work. In that case, strip the old surface, clean it fully, and rebuild the seasoning from scratch. I have restored pans that looked hopeless at first, and most of them came back with patience.
Common Mistakes to Avoid
A lot of problems with cast iron come from simple missteps. The good news is that they are easy to fix once you know them.
Avoid these common mistakes:
• Using too much oil, which leaves the pan sticky
• Skipping the drying step, which invites rust
• Baking at too low a temperature, which weakens the seasoning
• Not removing old residue before curing
• Washing a hot pan with cold water, which can shock the metal
• Storing the pan while damp or covered too tightly
The biggest mistake I see is impatience. People want instant nonstick results, but cast iron improves with layers and use. It is more like training a garden than flipping a switch.
How to Maintain the Cure After Seasoning
Once you cure cast iron cookware, maintenance matters just as much. A good cure can weaken if the pan is neglected.
To keep the seasoning strong:
• Wash after use with warm water and a soft brush
• Dry it immediately
• Add a light film of oil after drying if needed
• Store it in a dry place
• Avoid long soaks in water
• Cook fatty foods sometimes, since they help reinforce the surface
I like to think of maintenance as a small daily habit. Just like sharpening a knife keeps it useful, simple care keeps cast iron ready for the next meal.
Signs Your Cast Iron Cookware Is Properly Cured
A well-cured pan usually shows a few clear signs. You do not need perfection, but you should see progress.
Look for these signs:
• The surface looks darker and more even
• Food releases more easily during cooking
• Water beads up instead of soaking in
• The pan feels smooth, not rough or dusty
• There is no sticky or gummy residue
If the pan looks blotchy, that is not always a failure. Cast iron seasoning changes over time. What matters is function, not a showroom finish.
When to Re-Cure Cast Iron Cookware
You do not need to cure cast iron cookware every week. But there are times when a fresh round helps.
Re-cure the pan if:
• Rust appears
• Food starts sticking more than usual
• The surface looks dry or patchy
• You scrubbed off too much seasoning
• The pan has been stored improperly
A quick refresh can bring the pan back to life. Often, one good round in the oven is enough to reset it.
Helpful Tips from Real Kitchen Experience
Over the years, one thing has stayed true for me: cast iron rewards calm hands and simple habits. Rushing the process usually creates sticky seasoning or uneven results.
A few practical tips that really help:
• Use less oil than you think you need
• Heat the pan long enough for full bonding
• Let it cool slowly inside the oven
• Start with normal cooking after curing to strengthen the finish
• Do not panic if the first round looks faint
I have also learned that everyday cooking is part of the cure. Frying bacon, searing chicken, or making cornbread can all help build the surface over time. Cast iron often gets better by being used, not just stored.
Frequently Asked Questions of How to Cure Cast Iron Cookware
How long does it take to cure cast iron cookware?
A single curing cycle usually takes about one to two hours, plus cooling time. If you are building seasoning from scratch, plan on repeating the process two or three times for better results.
Can I cure cast iron cookware with olive oil?
You can, but it is not usually the best choice for high-heat curing. Oils with higher smoke points and better polymerizing behavior tend to create a more durable finish.
Do I need to cure a new cast iron pan?
Yes, most new pans benefit from curing, even if they come pre-seasoned. Factory seasoning is often just a starting layer, and a few home rounds usually improve performance.
Why does my cast iron feel sticky after curing?
Sticky cast iron usually means too much oil was used. The fix is to heat it again and wipe it more thoroughly before the next round.
How do I know if my cast iron is seasoned enough?
It should look darker, feel smoother, and release food more easily over time. You do not need a perfect mirror finish, but you should see better cooking performance and less sticking.
Can I use soap on cured cast iron cookware?
Yes, mild soap is fine for cleaning cured cast iron. Just avoid soaking it for long periods and make sure you dry it completely afterward.
Conclusion
Learning how to cure cast iron cookware is one of those kitchen skills that pays off for years. Once you understand the basics, it becomes simple: clean the pan, dry it fully, apply a thin layer of oil, and heat it well. From there, routine use and light care do most of the work.
If your pan looks rough now, do not give up on it. Cast iron is stubborn in the best way, and with the right cure, it can become one of the most reliable tools in your kitchen. Try the steps above, keep your layers thin, and let the pan improve with time. If this guide helped, save it for later, share it with a friend, or leave a comment with your own cast iron tips.