How to Clean a Burnt Pan with Salt in 2026?
Learn how to effortlessly clean a burnt pan with salt in 2026 using a simple, eco-friendly method that saves time and elbow grease. Just sprinkle coarse salt over the burnt residue, add a splash of water, and gently scrub—the abrasive texture lifts stubborn char without damaging your cookware. This quick, chemical-free hack is a game-changer for maintaining spotless pans year after year.
Why This Matters / Understanding the Problem
We’ve all been there—you’re cooking dinner, get distracted by a text or a kid asking for help, and suddenly your pan is smoking. The bottom is covered in a crusty, black layer that looks like it survived a volcanic eruption. You stare at it, half tempted to just throw the whole pan away.
But before you do that, let me tell you something: most burnt pans can be saved. And one of the easiest, cheapest, and most effective ways to tackle that stubborn char is with something you already have in your pantry—salt.
In 2026, eco-friendly cleaning and kitchen hacks are more important than ever. Instead of reaching for harsh chemicals or expensive scrubbers, learning how to clean a burnt pan with salt in 2026 is a smart, sustainable move. It’s gentle on your cookware, safe for your family, and kind to the planet.
Salt works because it’s mildly abrasive yet non-toxic. When combined with a little water or vinegar, it becomes a natural scrubbing agent that lifts burnt-on food without scratching your pan’s surface. Whether you’ve got stainless steel, nonstick, or even cast iron, this method is surprisingly versatile.
And the best part? It takes less than 10 minutes once you know the right steps.
What You Need
Before we dive in, let’s gather our supplies. The beauty of this method is that you probably already have everything at home.
Here’s your quick checklist:
- Coarse salt (like kosher or sea salt—table salt works in a pinch, but coarse is better for scrubbing)
- Warm water (hot is ideal, but warm will do)
- White vinegar (optional, but great for extra-stubborn burns)
- A soft sponge or non-abrasive scrubber (avoid steel wool unless you’re dealing with cast iron)
- A wooden or silicone spatula (for gently loosening debris)
- Dish soap (for the final wash)
No fancy tools, no special cleaners—just simple, everyday items. This is exactly why how to clean a burnt pan with salt in 2026 is such a popular search. People want solutions that are effective, affordable, and easy to replicate.
Step-by-Step Guide to How to Clean a Burnt Pan with Salt in 2026
Now, let’s get that pan looking brand new. I’ll walk you through each step like we’re in the kitchen together, coffee in hand.
Step 1: Let the Pan Cool Completely
First things first—don’t try to clean a hot pan. I made that mistake once and ended up with a warped skillet and a minor burn on my wrist. Not fun.
Let your pan sit for at least 15–20 minutes after cooking. If it’s still warm to the touch, give it more time. Cleaning a hot pan can damage the coating (especially on nonstick) and make the burnt bits harder to remove.
Once it’s cool, give it a quick rinse with warm water to loosen any loose debris. You don’t need soap yet—just get the big chunks out.
Step 2: Sprinkle a Generous Layer of Salt
Now comes the magic ingredient. Grab your coarse salt and sprinkle a thick layer—about ¼ to ½ cup—over the burnt area. You want full coverage, like you’re seasoning a steak.
Why salt? It’s naturally abrasive, which means it acts like a gentle scrub without scratching. Plus, it’s non-toxic and won’t leave behind chemical residues. That’s why so many people are turning to salt-based methods when they search for how to clean a burnt pan with salt in 2026.
If the burn is really bad, don’t be shy—add more salt. The thicker the layer, the better it will work.
Step 3: Add a Splash of Water or Vinegar
Now, pour in just enough warm water to dampen the salt—about 2–3 tablespoons. You’re not making soup; you’re creating a paste.
If the burn is extra stubborn (think: burnt tomato sauce or caramelized sugar), swap water for white vinegar. The acid helps break down the carbonized bits, and the salt gives it scrubbing power.
Let this mixture sit for 5–10 minutes. This gives the salt and liquid time to penetrate the burnt layer. I like to use this time to wipe down my counters or prep the next meal—multitasking at its finest.
Step 4: Scrub Gently with a Soft Sponge
After the soak, grab your soft sponge or non-abrasive scrubber. Start scrubbing in circular motions, applying light to medium pressure.
You’ll notice the burnt bits starting to lift almost immediately. The salt acts like tiny scrubbers, lifting the char without damaging the pan.
If you hit a tough spot, don’t force it. Add a little more water or vinegar and let it sit another few minutes. Patience pays off here.
For nonstick pans, be extra gentle. Avoid anything that could scratch the surface. A silicone spatula can help loosen big chunks before you scrub.
Step 5: Rinse and Repeat if Needed
Once you’ve scrubbed the entire burnt area, rinse the pan thoroughly with warm water. Check for any remaining residue.
If there’s still a bit of stubborn gunk, don’t panic. Just repeat steps 2–4. Sometimes, especially with older burns, it takes two rounds.
I once had a pan that had been sitting in the sink for two days after a failed risotto attempt. Two rounds of salt and vinegar, and it looked like new. Seriously.
Step 6: Wash Normally and Dry
After the burnt layer is gone, wash the pan with warm, soapy water like you normally would. This removes any leftover salt and ensures your pan is clean and ready for the next use.
Dry it immediately with a clean towel to prevent water spots or, in the case of cast iron, rust.
And that’s it! Your pan is back in action.
Pro Tips & Common Mistakes to Avoid
Over the years, I’ve learned a few tricks—and made a few blunders—that I want to share with you.
Pro Tip: For cast iron pans, you can use a bit more elbow grease. Salt is safe and actually helps maintain the seasoning. Just avoid soap after scrubbing—rinse and dry thoroughly instead.
Warning: Don’t use salt on damaged nonstick coatings. If your pan is flaking or peeling, it’s time to replace it. Scrubbing could release harmful particles.
Common Mistake: Using too much water. You want a paste, not a soup. Too much liquid dilutes the salt’s effectiveness.
Pro Tip: Add a drop of dish soap to your salt scrub for extra grease-cutting power. It’s still natural, just a little more effective.
Common Mistake: Scrubbing too hard with abrasive tools. Steel wool might work on cast iron, but it’ll ruin nonstick and scratch stainless steel. Stick to soft sponges.
One thing I’ve noticed is that people often give up too soon. Burnt pans don’t always come clean in one try—especially if the burn is old or thick. But with a little patience and the right technique, you’ll be amazed at what salt can do.
FAQs About How to Clean a Burnt Pan with Salt in 2026
Can I use table salt instead of kosher salt?
Yes, but coarse salt works better because it has more texture for scrubbing. Table salt is finer and may dissolve too quickly. If that’s all you have, it’ll still help—just use a bit more.

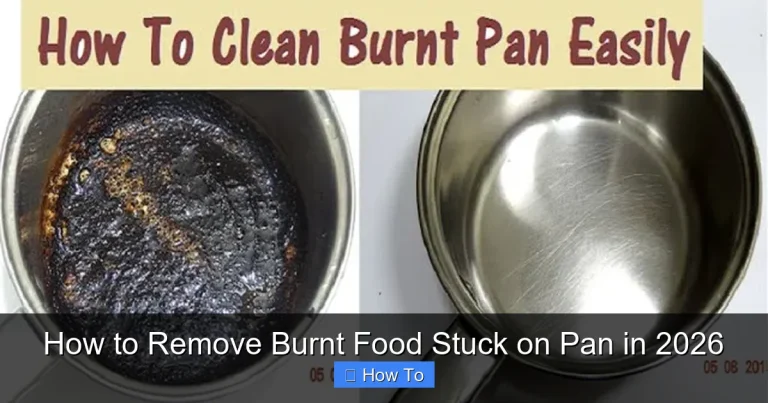
Visual guide about How to Clean a Burnt Pan with Salt in 2026
Image source: tastingtable.com
Will salt scratch my nonstick pan?
No, as long as you use a soft sponge and gentle pressure. Salt is much gentler than steel wool or harsh scrubbers. Just avoid metal utensils during the process.
How long should I let the salt sit?
5–10 minutes is usually enough. For really tough burns, you can leave it up to 30 minutes. The longer it sits, the easier it is to scrub off.
Can I use lemon instead of vinegar?
Absolutely! Lemon juice has natural acidity and works just as well. Plus, it leaves a fresh scent. Just squeeze half a lemon over the salt and let it sit.
What if the burn is on the outside of the pan?
The same method works! Just be careful not to get water inside electrical components if it’s a nonstick pan with a removable handle. For stovetop pans, scrub the exterior just like the interior.
Is this method safe for stainless steel?
Yes! Salt is actually great for stainless steel. It helps remove discoloration and restores shine without damaging the surface.
Can I prevent burnt pans in the future?
Definitely. Use lower heat, stir regularly, and avoid leaving food unattended. Also, deglaze your pan with a little liquid (water, broth, or wine) right after cooking to loosen bits before they burn.
Final Thoughts
Cleaning a burnt pan doesn’t have to be a nightmare. With a little salt, a bit of patience, and the right technique, you can restore your cookware to like-new condition—no harsh chemicals or expensive tools required.
Learning how to clean a burnt pan with salt in 2026 isn’t just about saving a pan. It’s about embracing smarter, greener habits in the kitchen. It’s about reducing waste, saving money, and feeling confident that you can handle whatever cooking disaster comes your way.
So the next time you walk into the kitchen and see that dreaded black crust, don’t panic. Grab your salt, take a deep breath, and remember: you’ve got this.
And if all else fails? Well, at least you’ll have a great story to tell over dinner.